Group Management
Creating New Group

Click Add to add a group, which will pop up the editing screen of Groups.
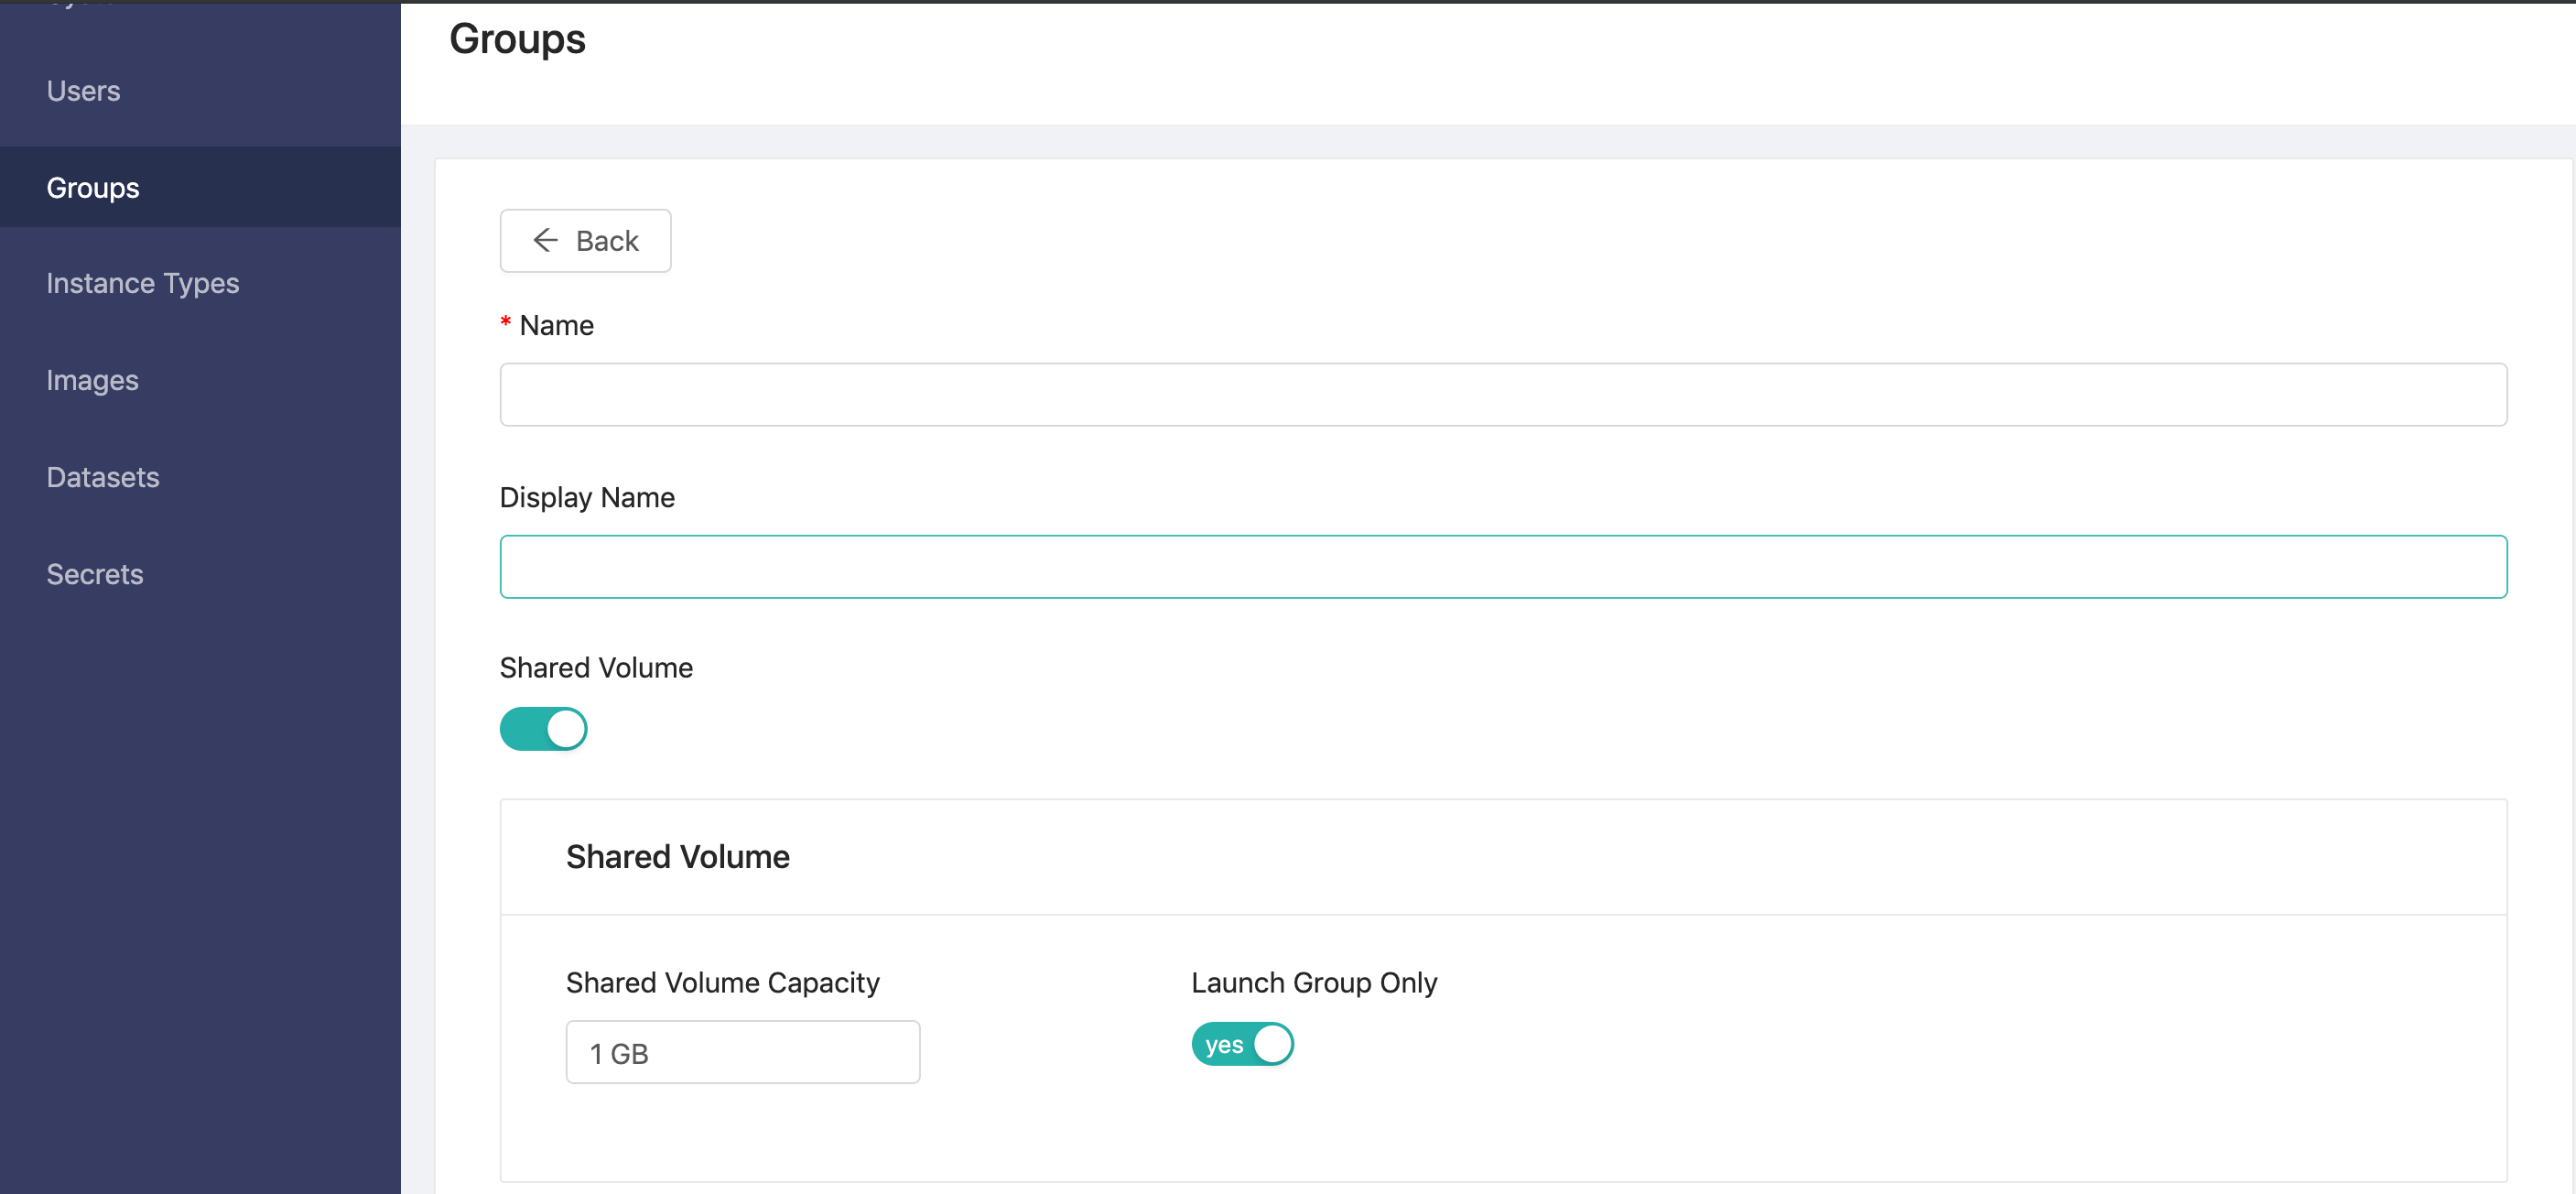
You need to fill in the fields in the above picture:
Name(required): Only lowercase letters, numbers, dash-and the bottom line_can be filled in.Display name
Shared Volume: Create shared volume with specific capacity.
Shared Volume CapacitySet the capacity of the shared volume.Launch Group Onlyif enabled, the shared volume isonly mountedwhen users select thesame groupto launch a project on PrimeHub page.
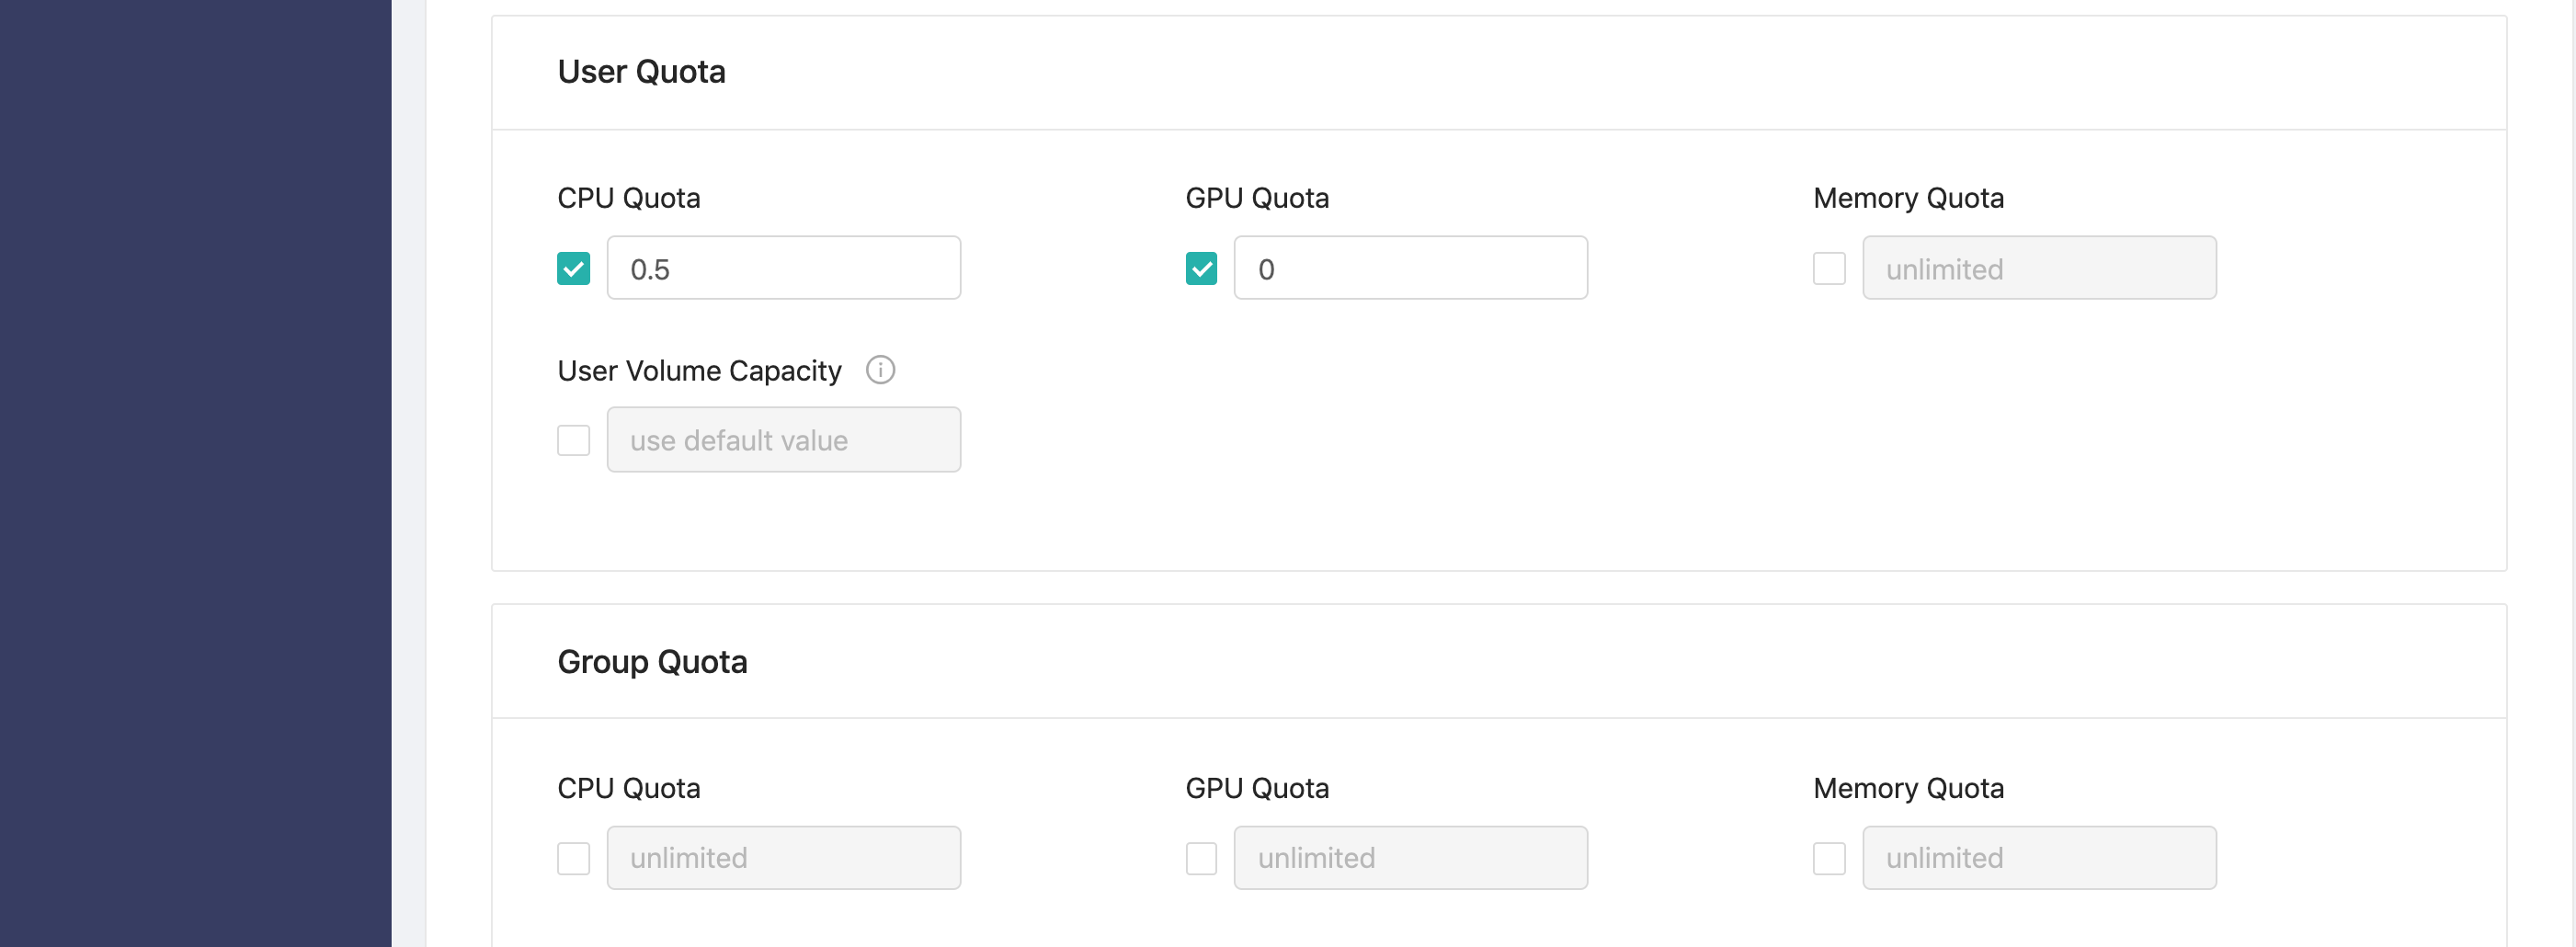
User Quota: Set quotas for each user in this group.
CPU QuotaWhen the user chooses the group, how many CPU can be used by the user. The default is0.5.GPU QuotaWhen the user chooses the group, how many GPU can be used by the user. The default is0. Default is0that means users can't use GPU.Memory QuotaWhen the user chooses the group, how many Memory can be used by the user. The default isunlimited.Disk QuotaWhen the user chooses the group, how many Disk can be used by the user. The default is20GB.
Group Quota: Set quota for the whole group.
CPU QuotaWhen the user chooses the group, how many CPU can be shared by all users in the group. The default isunlimited.GPU QuotaWhen the user chooses the group, how many GPU can be shared by all users in the the group. Default isunlimited.Memory QuotaWhen the user chooses the group, how many Memory can be shared by all users in the the group. Default isunlimited.
Click Confirm to complete the addition.
Deleting Group
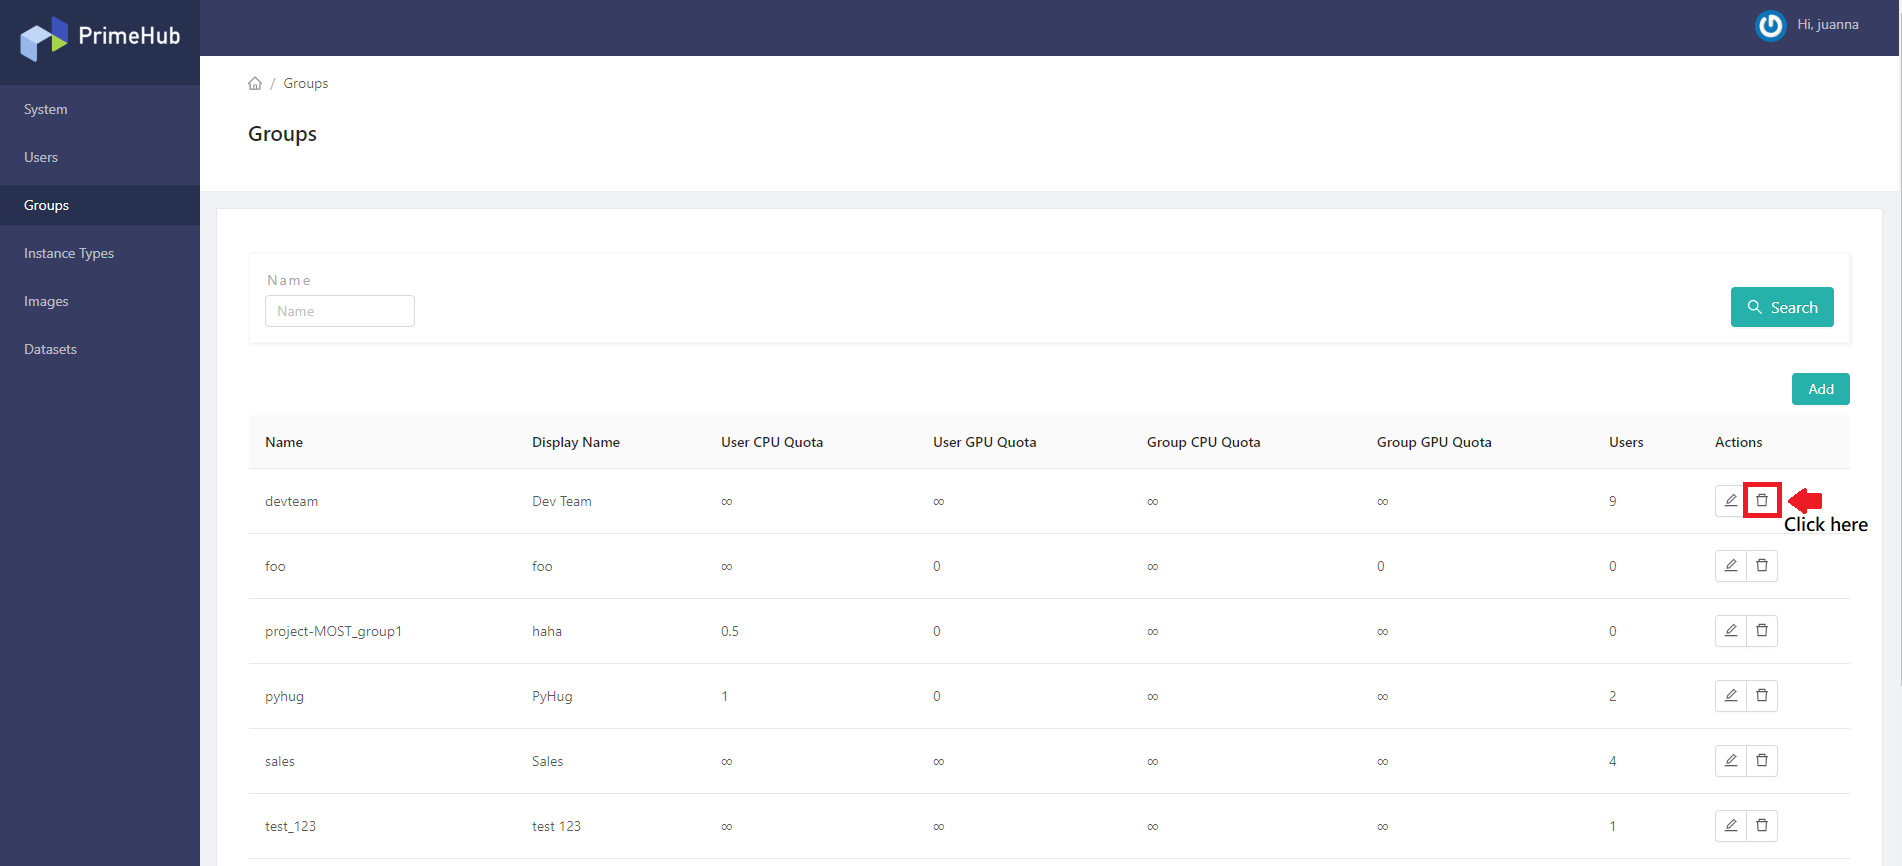
Click Delete in the group list, the confirmation dialog will pop up, and the group will be deleted when you click OK.
Editing Group
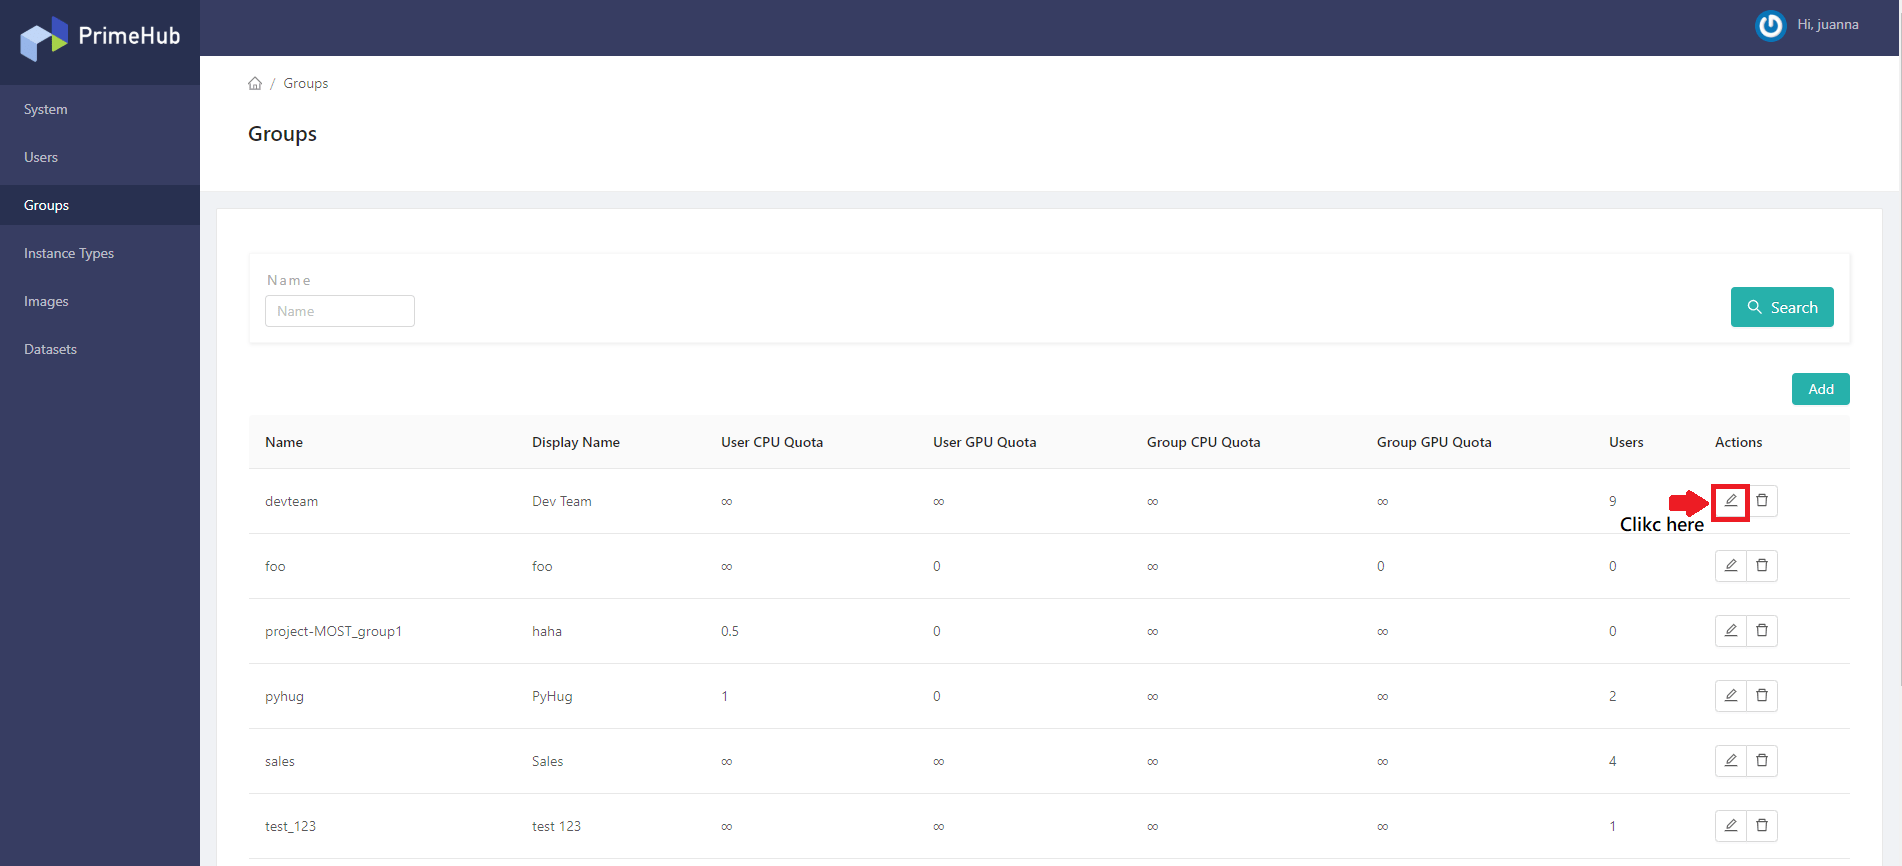
Click Edit to enter the edit page of the Group.
Connecting Existed Users
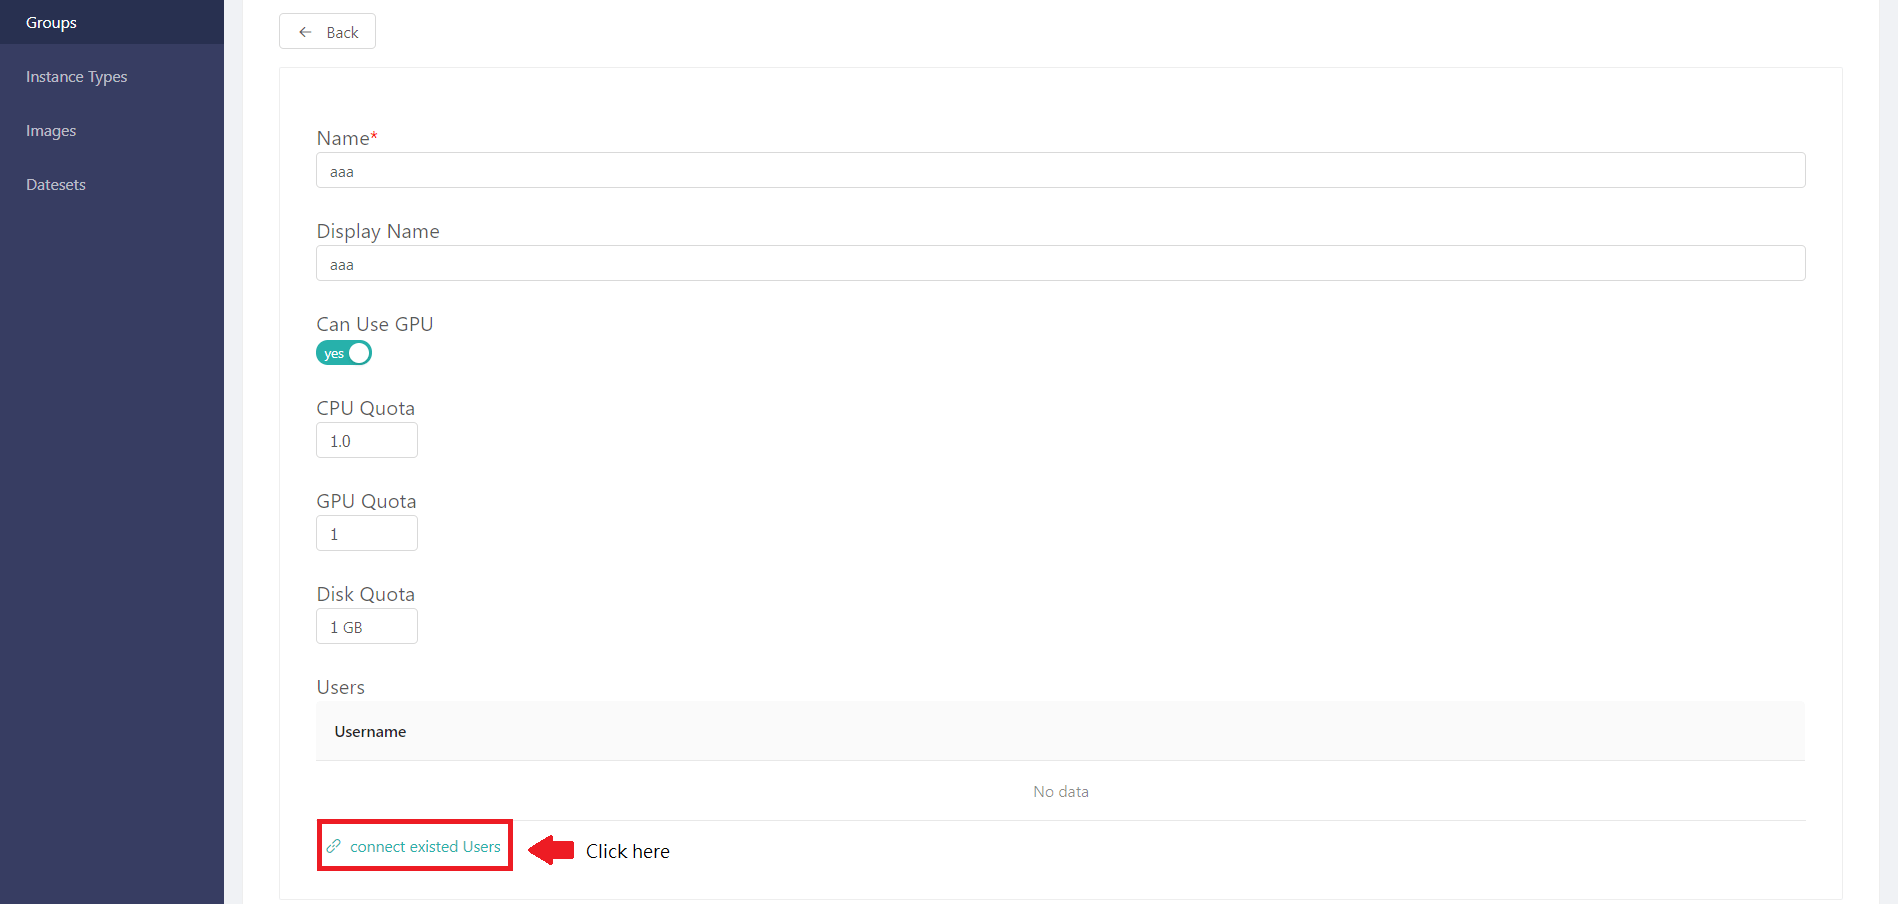
Click connect existing users under the edit Group screen to select the group's user from the existing Users list and link them.