Compare MLflow Models
In this tutorial, we will show how to record parameters, metrics, and artifacts from notebooks or jobs to MLflow server. Then, we can view models and compare records in MLflow server.
What we need?
A MLflow server or create an MLflow server in PrimeHub Apps
The image
infuseai/docker-stacks:tensorflow-notebook-v2-4-1-dbdcead1An instance type >= minimal requirement (CPU=1, GPU=0, Mem=2G)
The prepared notebook file of the example
Choose a group with enabled Shared Volume (a.k.a Group Volume)
The API token
Please have the image, the instance type on PrimeHub, or request administrators for assistance before we start.
Steps
Enter Notebook from User Portal, select the image, the instance type, and start a notebook.

From File Browser of Notebook, navigate into the directory of
<group_name>which is a Group Volume; here mlflow is our working group.While inside the group volume, copy/drag the downloaded
task_mlflow_demo_compare_notebook.ipynbthere in File Browser and open it.Replace
TRACKING_URIin the notebook to the service endpoint of your MLflow server.Run All Cells in the notebook, you will see a new run in
compare-experimentin the MLflow UI. Click on theStart Timeto view details.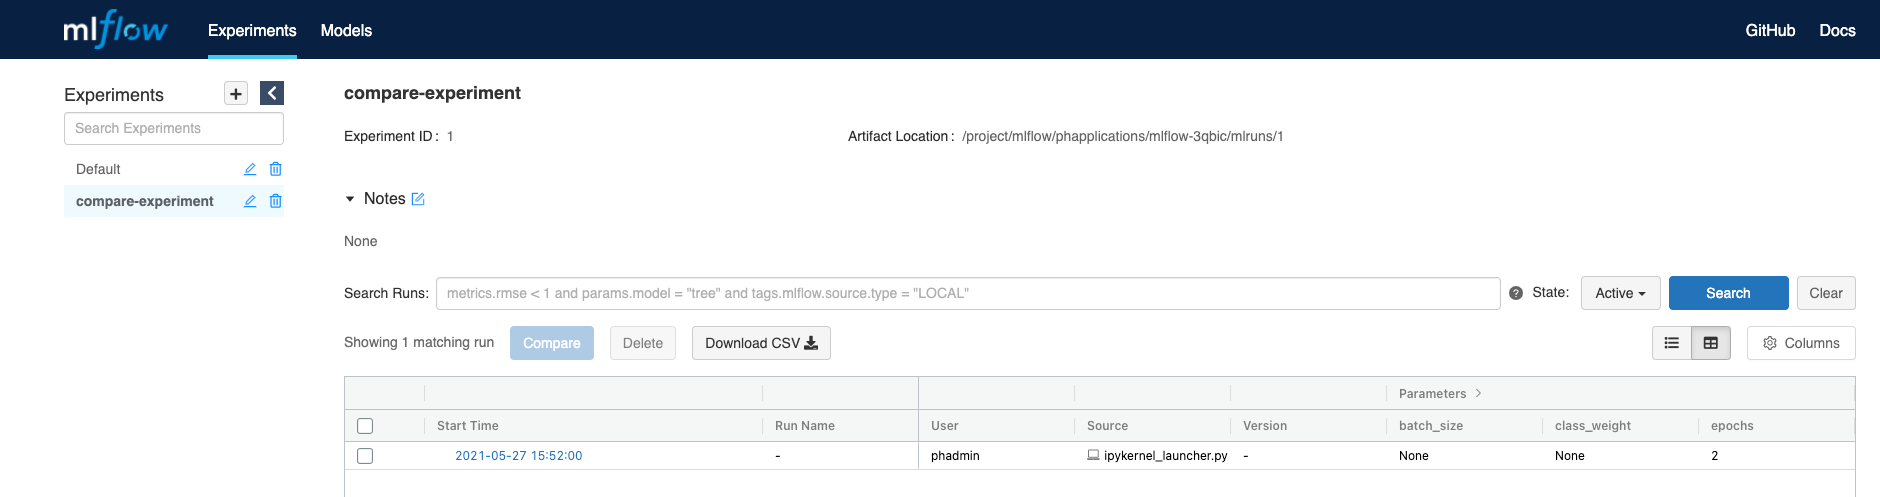
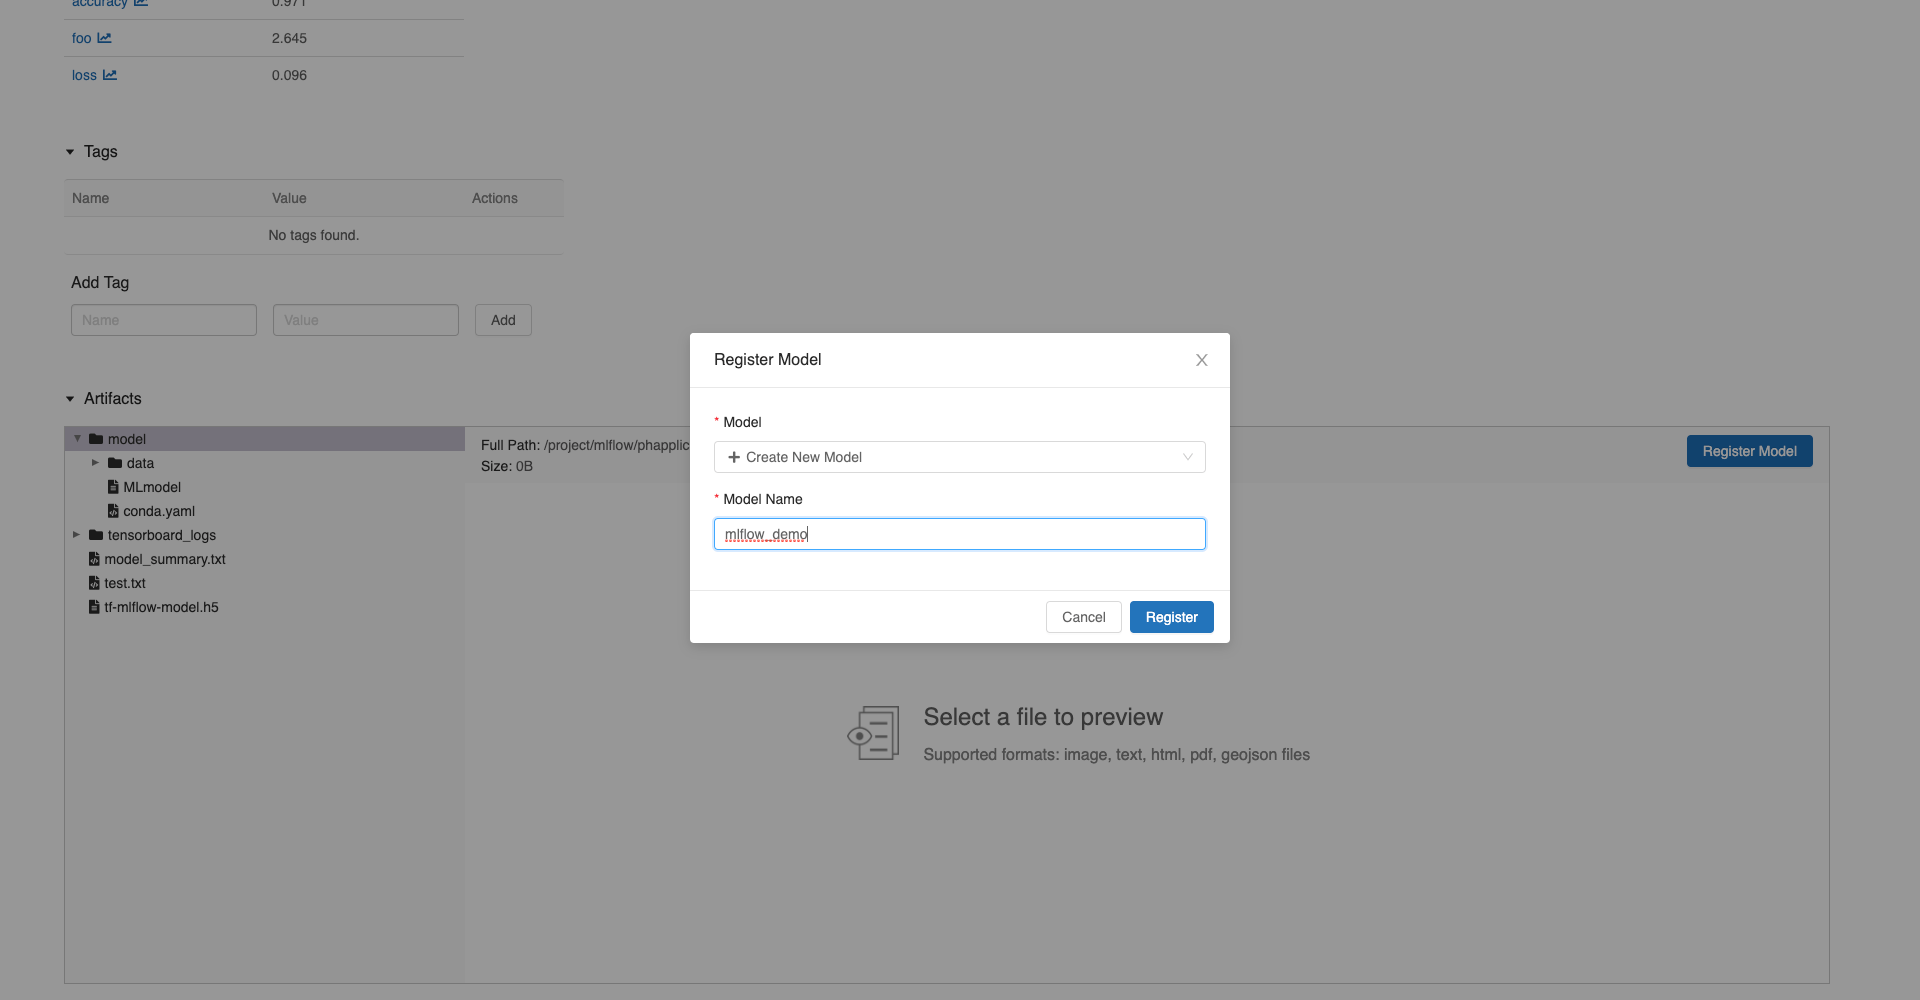
Scroll down to the artifects and click on the model folder to register model.
In the
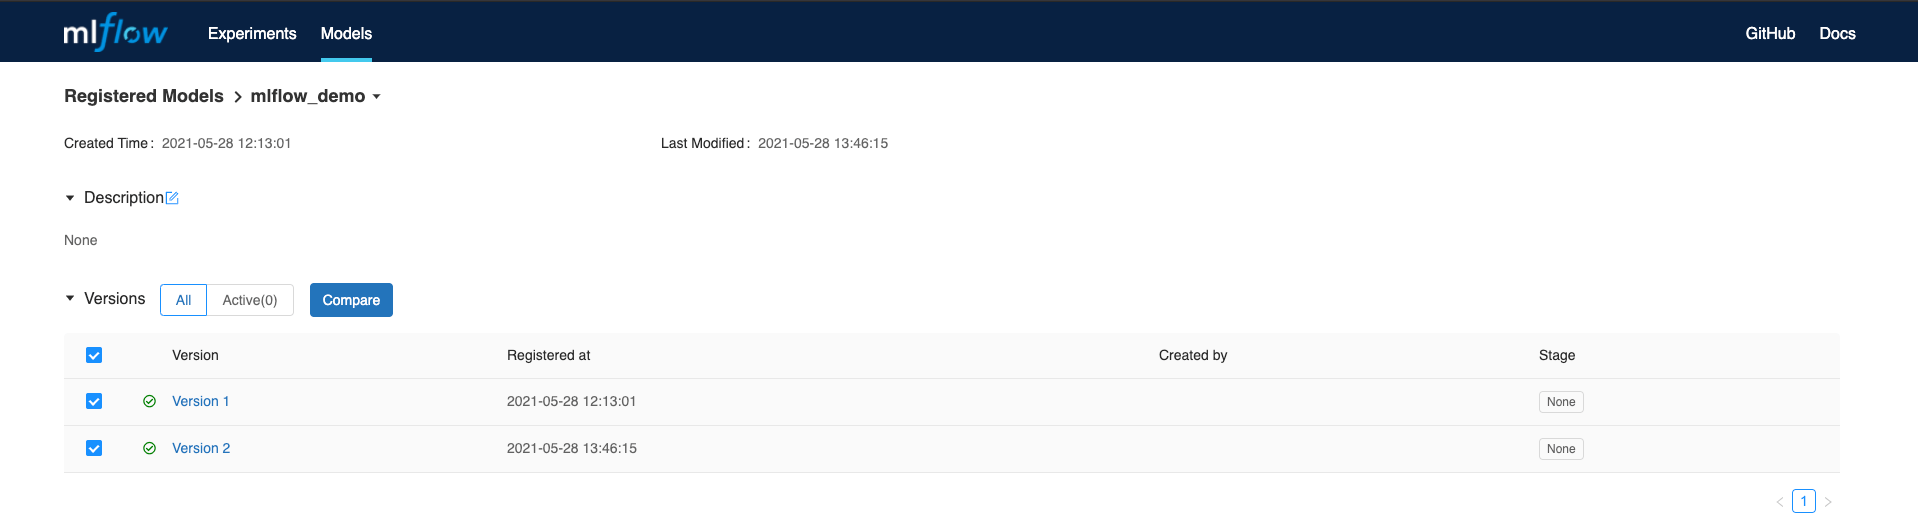
Modelspage, you can see a new register model.
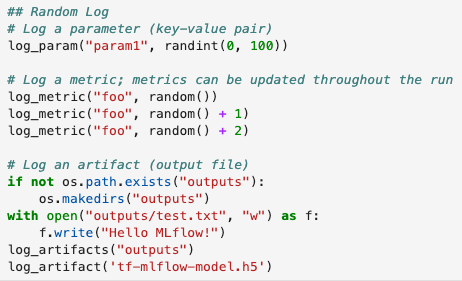
In the notebook, edit it to log parameters, metrics, and artifacts.
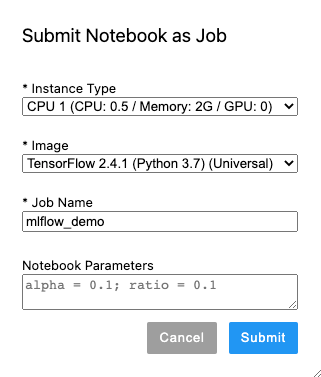
Set the API token.

Submit notebook as job.
You can see the job status in PrimeHub
Jobs.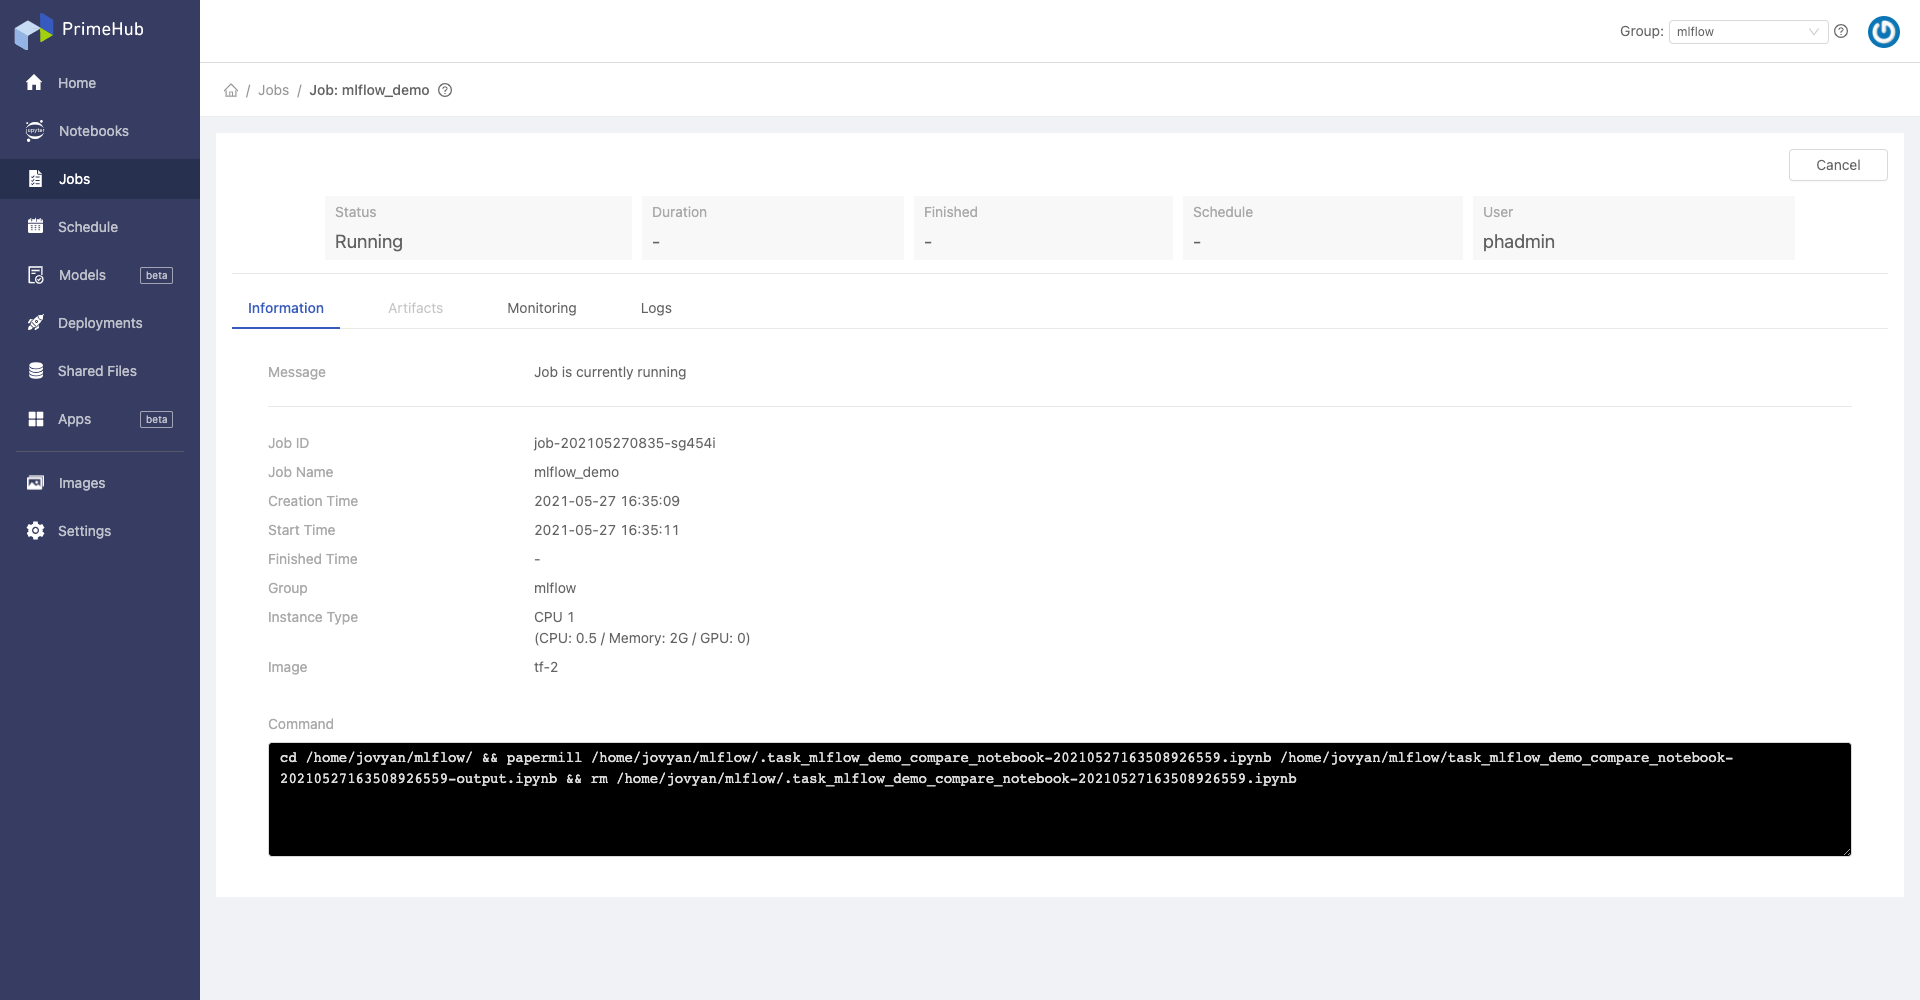
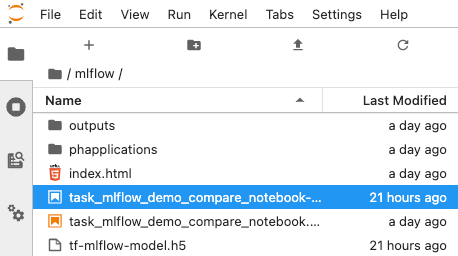
After job done, a notebook is added, which is the result.
Register the new run with the same model name. In the
Modelspage, the latest version isVersion 2.
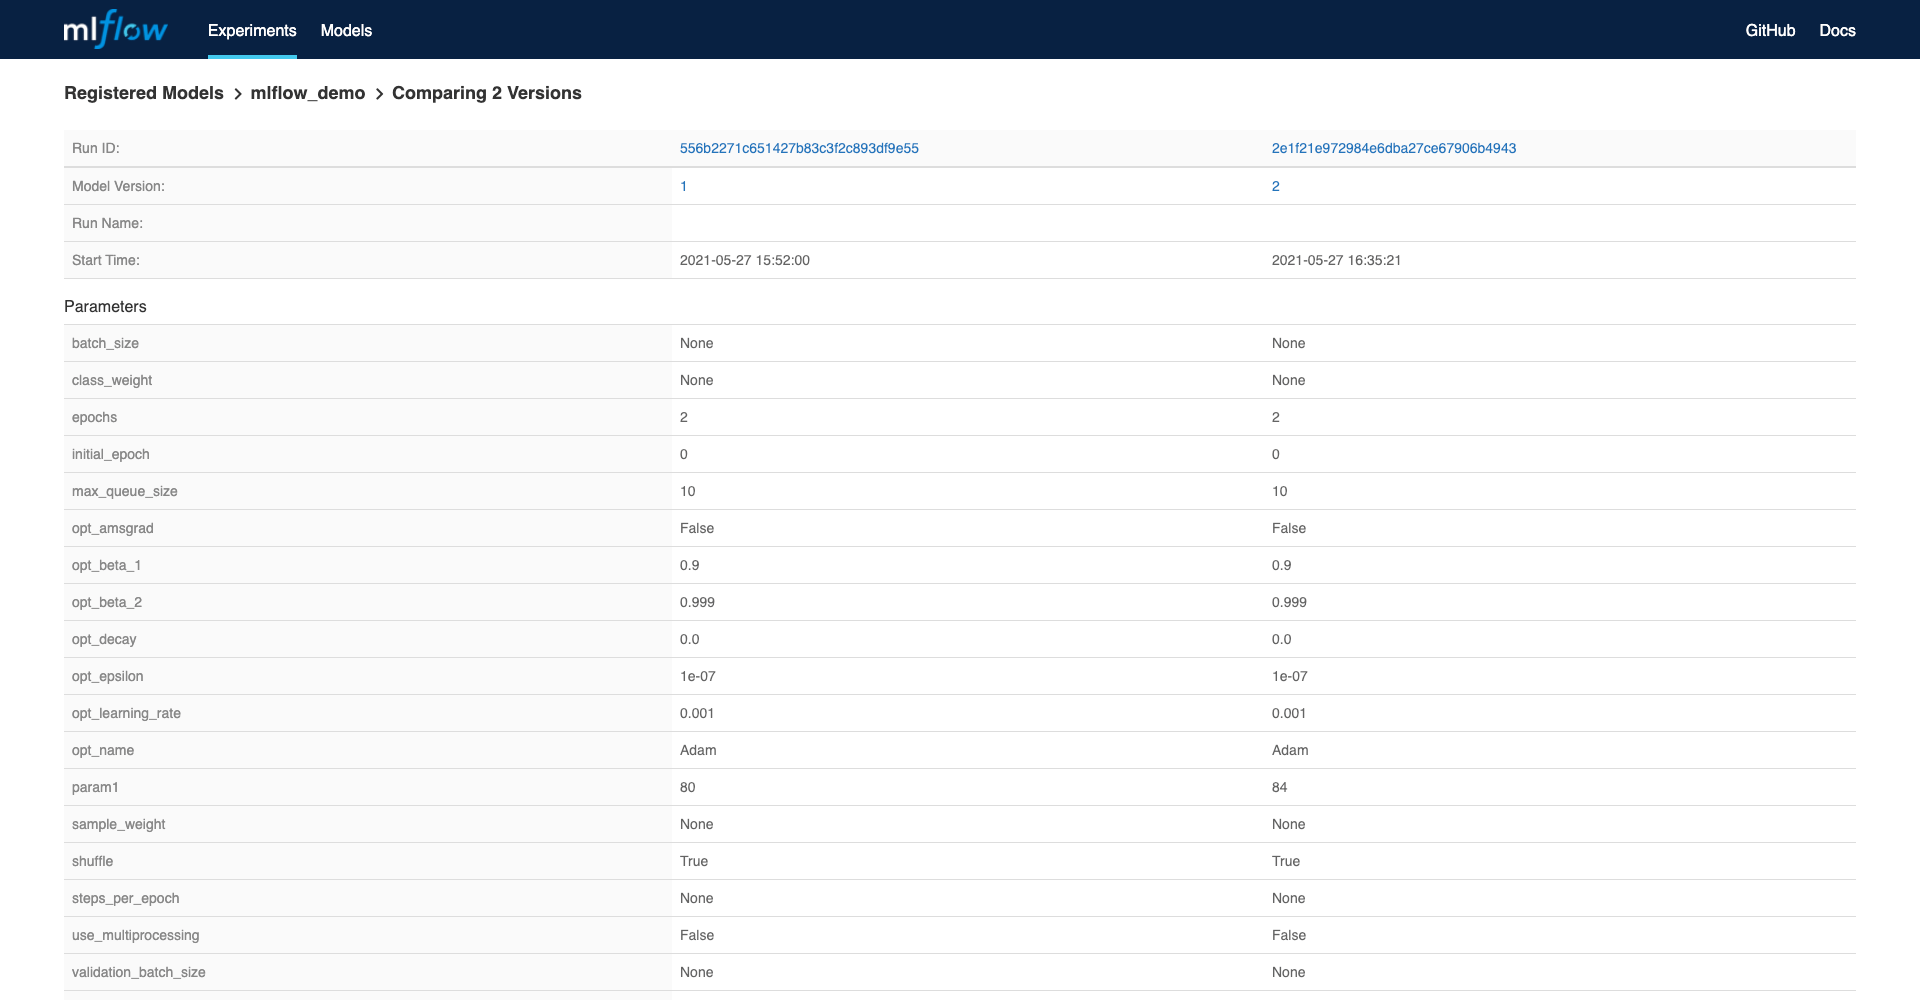
Click on the model name, you can see and compare those versions.