Image Management
Overview
Image management 提供管理者 Image 的管理能力,如:新增、刪除、編輯及群組權限,甚至可以進一步客製 Image。
Add New Image
點擊 New Image 加入映像檔

Display name: 必填,只能填寫小寫字母、數字、點(“.”)、連接號(“-”)。Image name: 依據 Display name 自動產生。Description: 描述。
選擇加入映像檔方式 Use existing image 或 Build custom image。
Use Existing Image
加入已存在的映像檔。
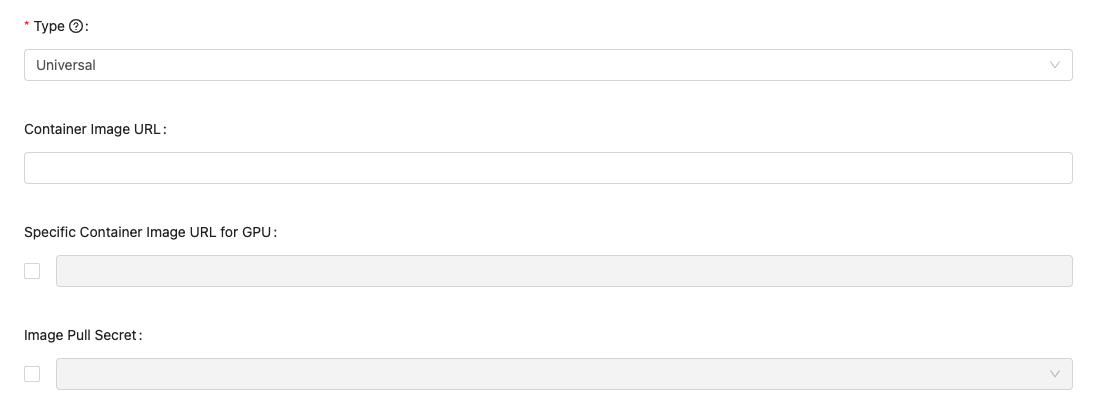
Type:cpu,gpuanduniversal: 指定該 Image 的 Type。Container Image URL: 填入該 Image Url 的位置。參考
Specific Container Image URL for GPU: 當 Type 為universal時,可以勾選為GPU指定不同的 image。未勾選時,預設為跟Container image url一樣。Image Pull Secret勾選是否需要指定 pull-secret ,並從選單指定該 secret。Global: 設定成 Global 讓所有群組都可以存取;反之, 透過Edit Groups指定可以存取的群組。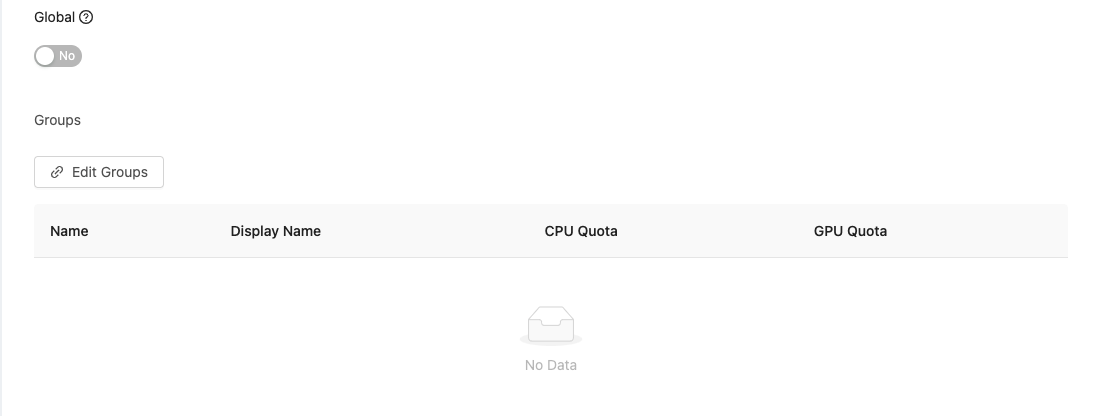
點擊 Confirm 加入。
Build Custom Image
創建客製映像檔並加入。
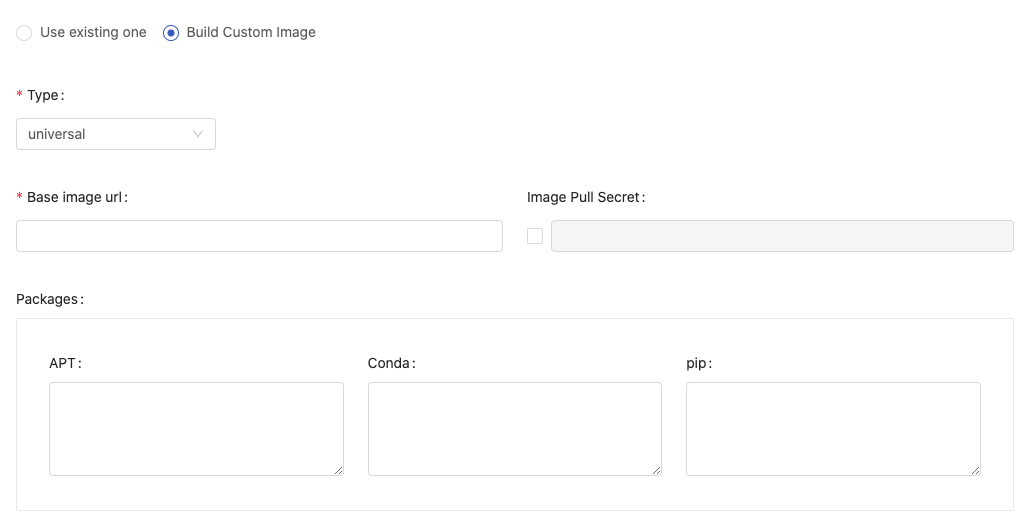
Type:cpu,gpuanduniversal: 指定該 Image 的 Type。Base image必填,base image 的 url。我們可以輸入任何有效的 Image URL,或是可以從自動列舉清單中選擇,已經透過 Image 管理加入至 PrimeHub 的 Image。參考Image PullSecret如果 pull secret 為必要,請勾選。Packages於對應的套件管理下輸入要預先安裝的套件名稱。如果需安裝複數個套件時,請輸入一行為一套件,換行後輸入下一個套件
Global: 設定成 Global 讓所有群組都可以存取;反之, 透過Edit Groups指定可以存取的群組。
最後點選 Confirm 啟始創建工作。
指定 Conda 套件符合條件
特別提及: Conda 支援指定套件的來源 channel,並可以進一步指定套件符合條件 [參考⇗]。 語法如下:
(channel(/subdir):(namespace):)name(version(build))[key1=value1,key2=value2]
例: 安裝由conda-forge channel 提供的numpy套件,如同原始頁面⇗。
指定-c conda-forge:: channel 再配合其進階條件:
-c conda-forge::numpy==1.17*
Building in progress
創建中的映像檔名稱旁會有個三角提示,提示此映像檔尚未創建完成。

點擊 Image building in progress 檢視 Build Details 及 Log。
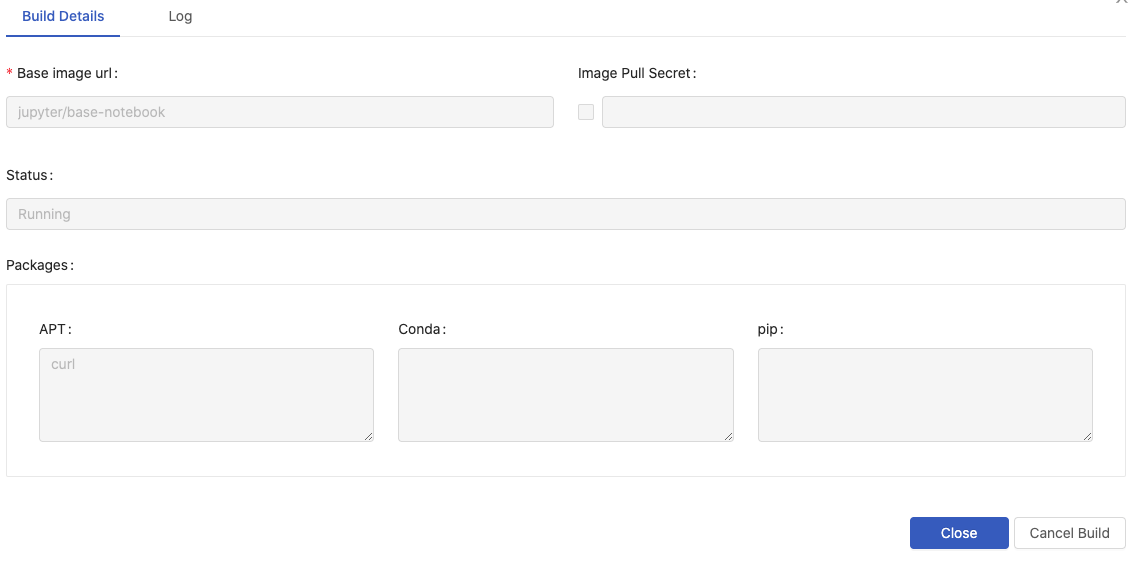
點擊 Cancel Build 撤消創建。
View build details and Rebuild
創建完成後,映像檔名稱的三角提示即消失。映像檔則可從各個映像檔清單選用;

點擊 View build details 檢視客製映像檔規格內容及創建過程記錄;進一步可編輯內容來重新創建映像檔。
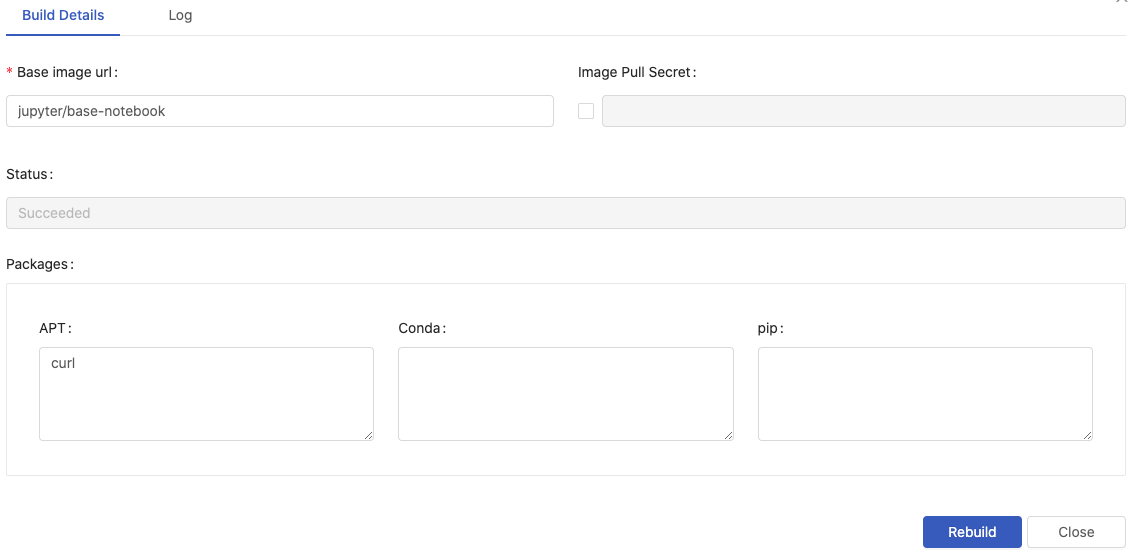
更新內容且點擊 Rebuild 即可重新創建映像檔。
System Image
加入的映像檔,不論是現有映像檔或是創建映像檔,則都可從映像檔清單選用;i 提示該映像檔從屬於 Group。

Actions

點擊「筆」圖示來編輯;點擊「垃圾桶」圖示來刪除。