2 - Train and Tune the Model
In this tutorial we will train our model using the labeled data from Part 1, learn how to tweak parameter values, and submit our notebook as a job.
Prerequisites
To track our experiments, we must first install MLflow, which is available as part of PrimeHub Apps.
Install MLflow
In the User Portal left sidebar, click Apps and then click the + Applications button.
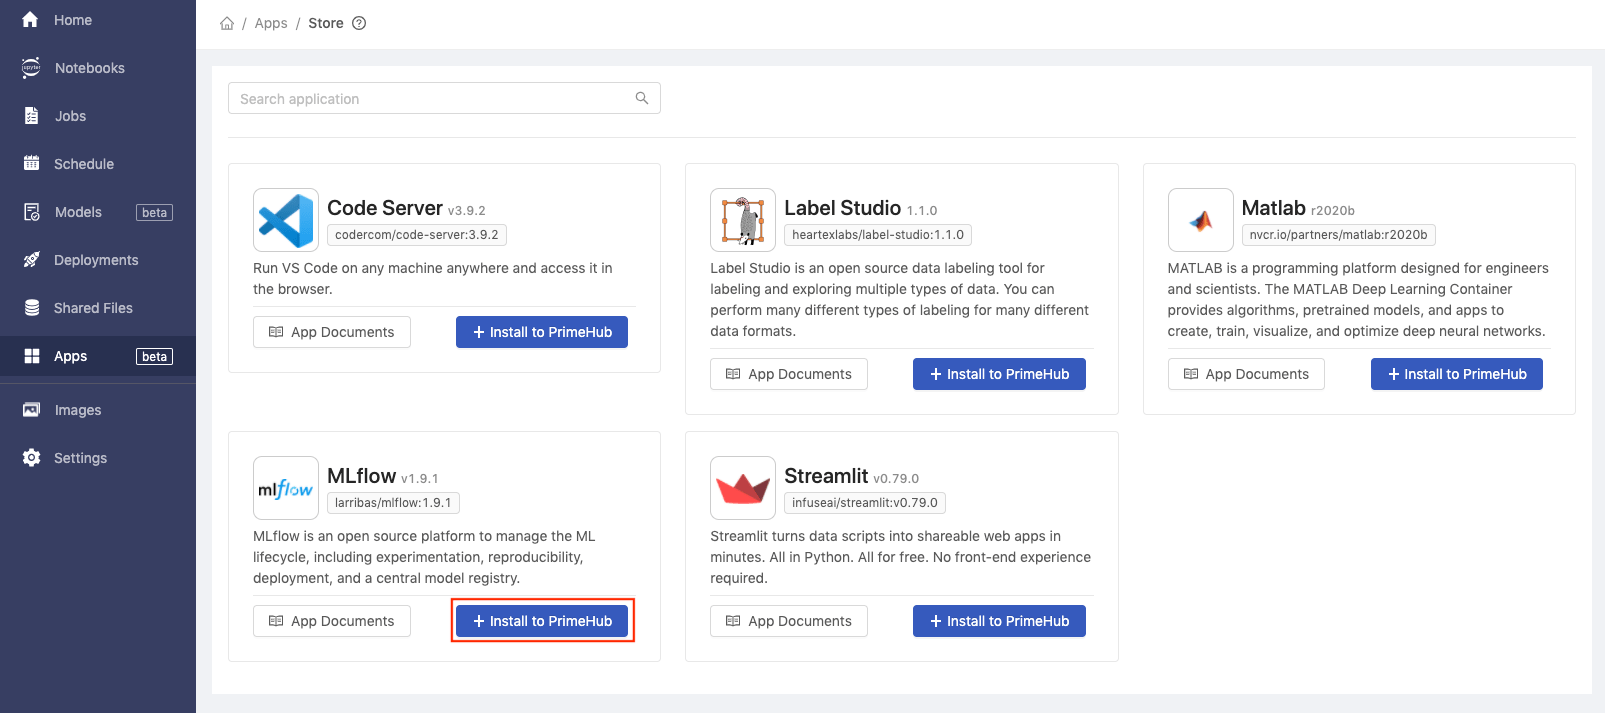
Find MLflow and click Install to PrimeHub .
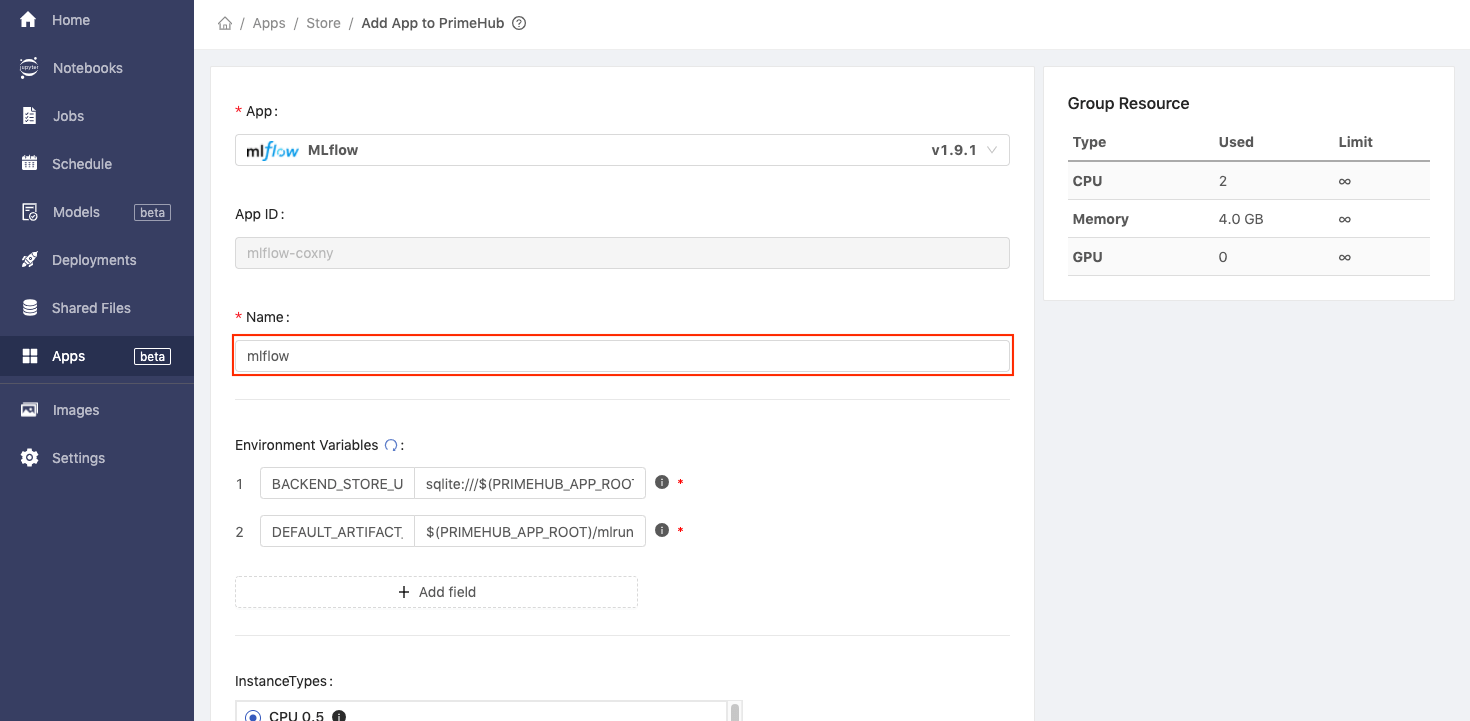
Enter the Name as mlflow.
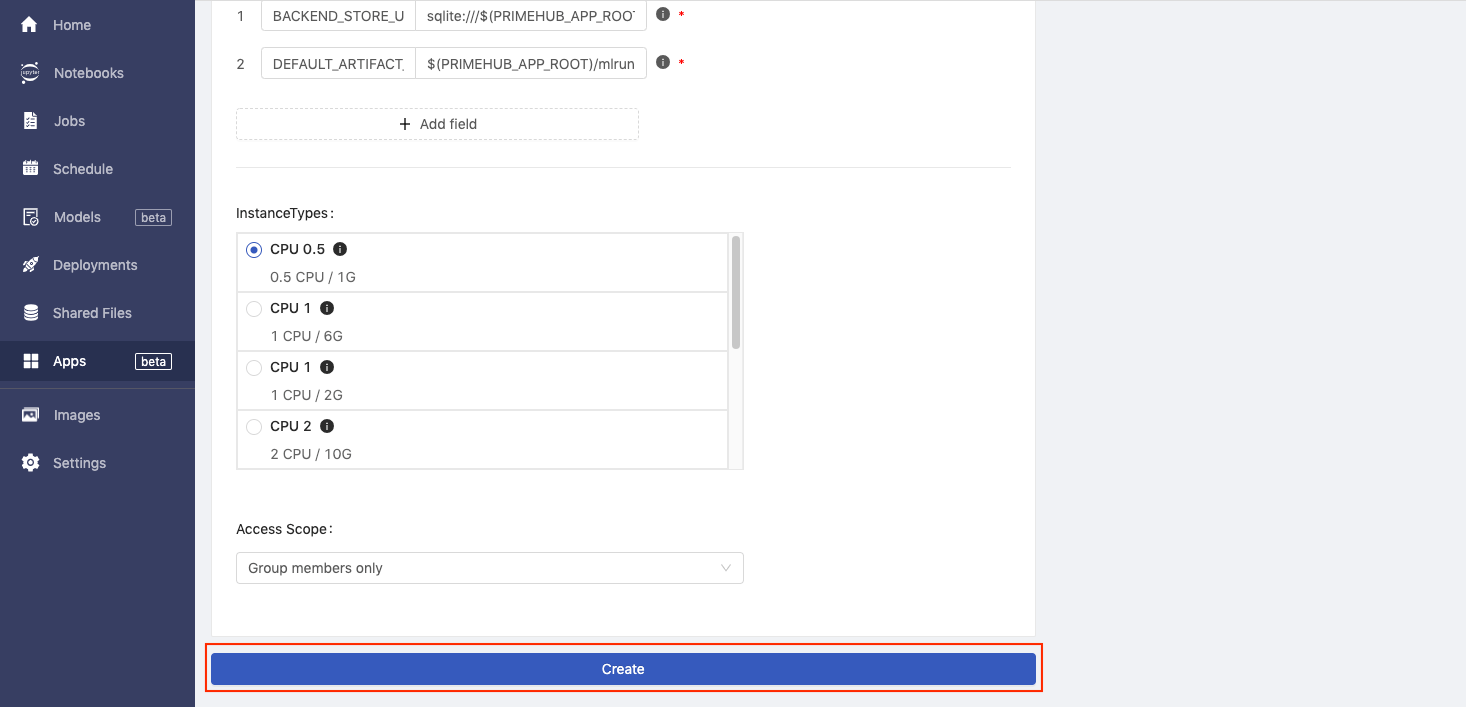
Click the Create button.
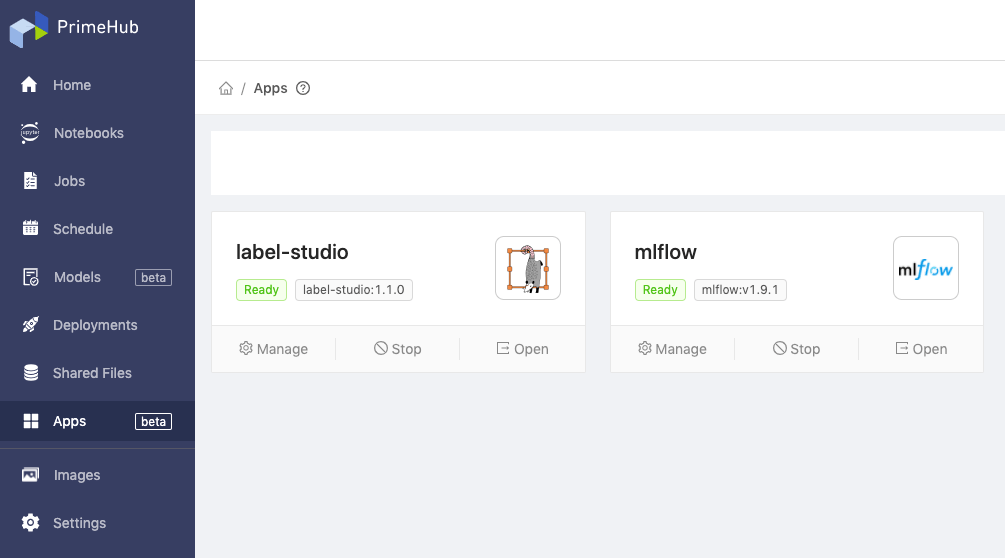
When MFflow has finished installing, you will see the green Ready label.
Connect MLflow to PrimeHub
We can now connect MLflow to PrimeHub, which will enable the automatic exporting of notebook run results into MLflow.
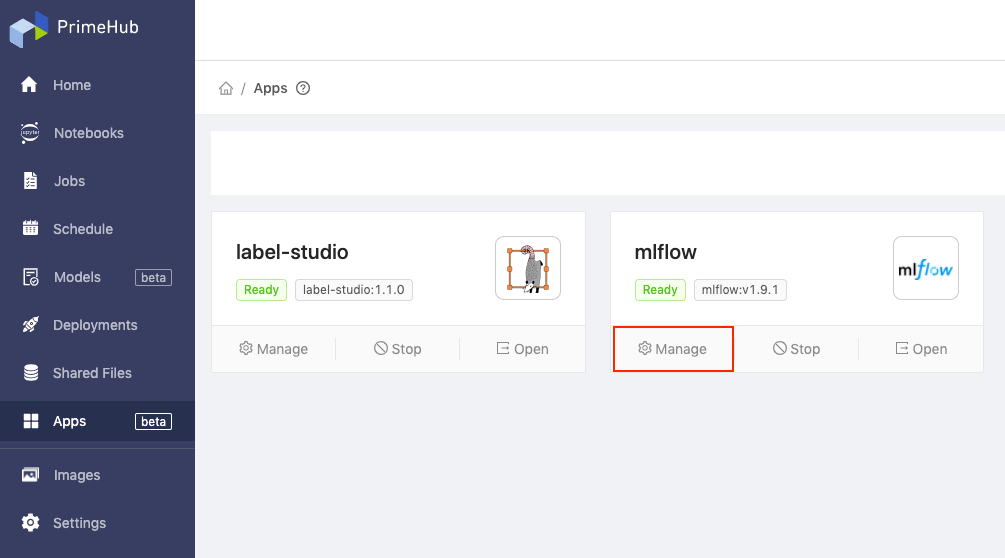
On the Apps page, find MLflow and click Manage.
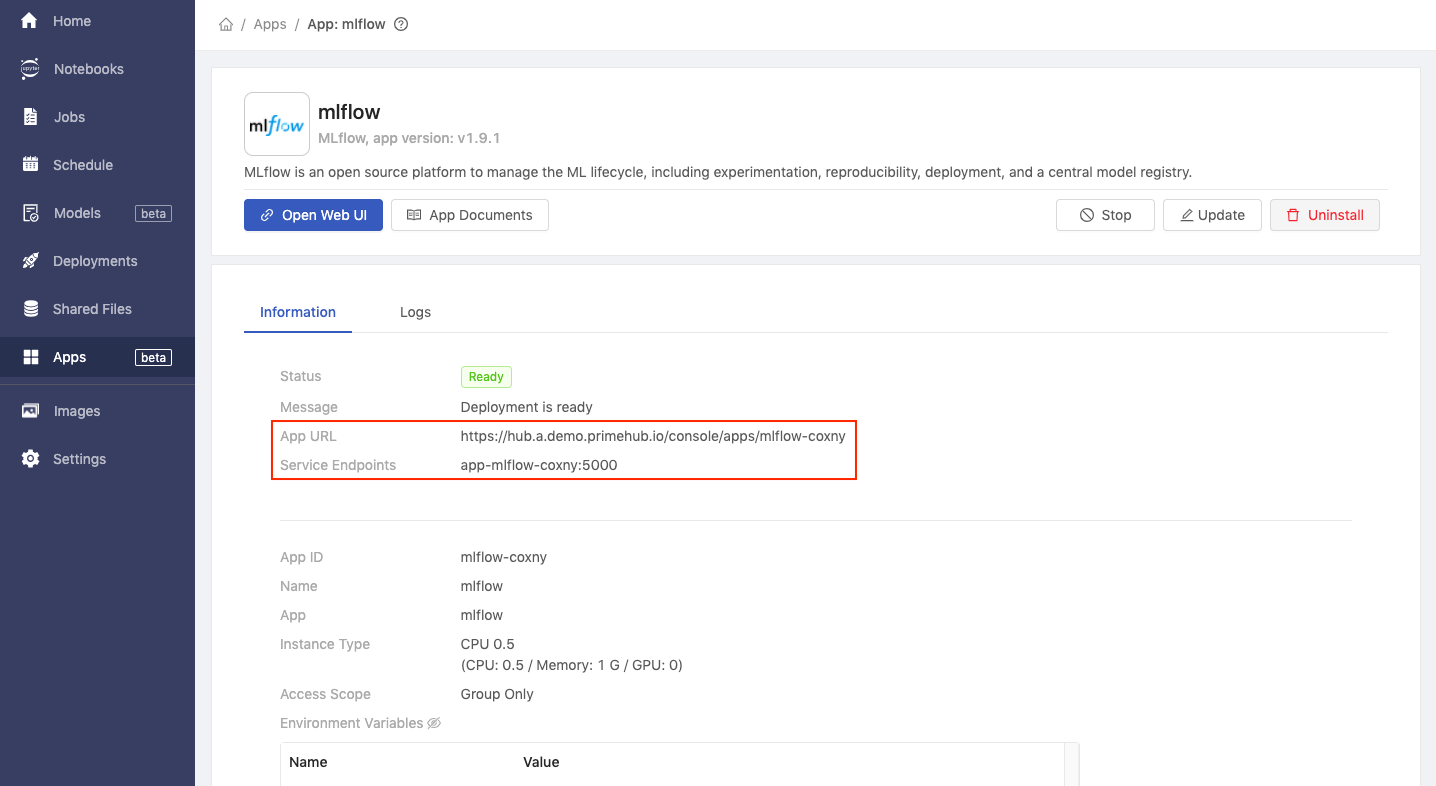
Make a note of the App URL and Service Endpoints values.
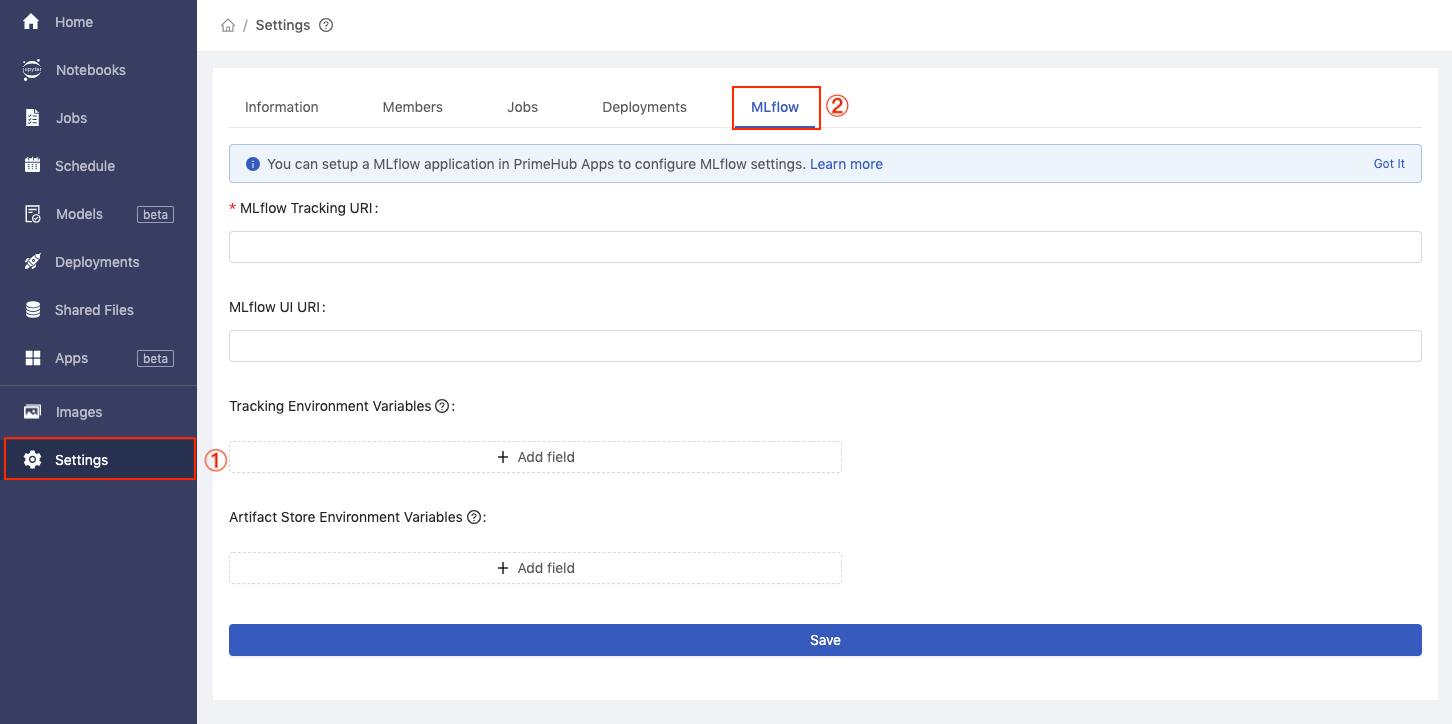
Click Settings in the left sidebar and then click the MLflow tab.
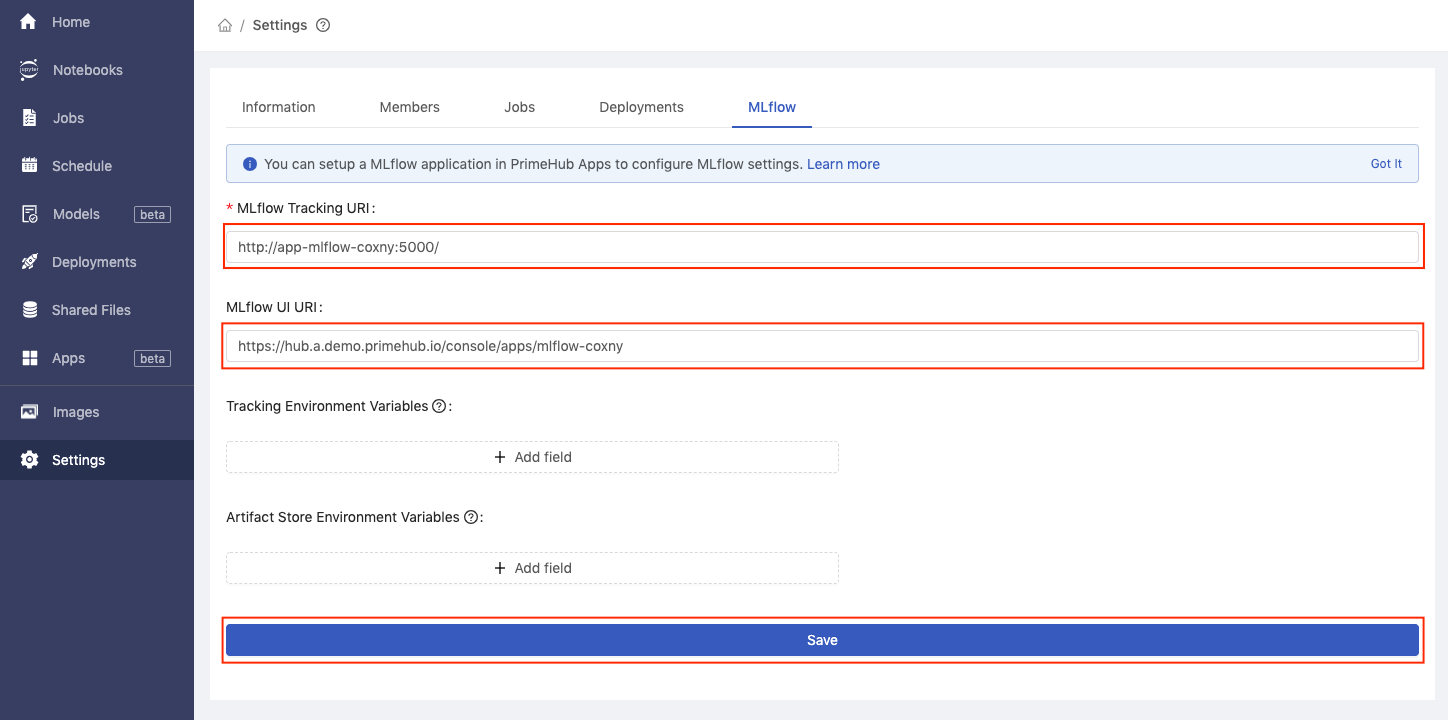
In the MLflow Tracking URI text field enter the service endpoints value we copied earlier, preceded by ‘http://’.
E.g. http://your-service-endpoints
In the MLflow UI URI text field enter the App URL value we copied earlier. Then, click the Save button.
Train the Model
Now that MLflow is installed and connected to PrimeHub, we can go back to our Notebook and start training the model.
Run all cells in the Start Training section of the script.
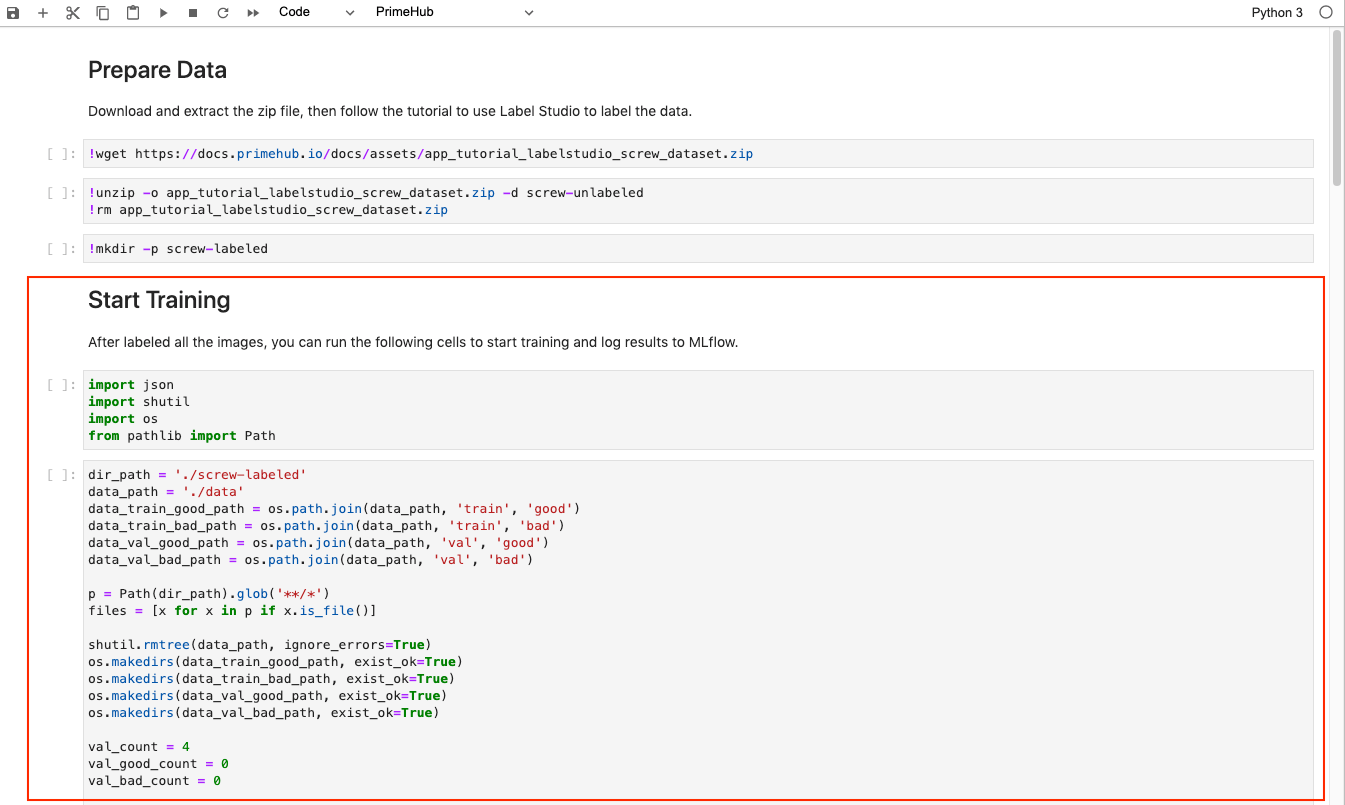
The script will parse our labeling results (stored in JSON files at the end of Part 1) and copy the images into four folders located in ~/<group_name>/screw:
data/train/good: Good screw images as the training datasetdata/train/bad: Bad screw images as the training datasetdata/val/good: Good screw images as the validation datasetdata/val/bad: Bad screw images as the validation dataset
The script also sets the experiment name to tutorial_screw_train and enables the MLflow autologging API, which will automatically export our run to MLflow for experient tracking.
Checking the results at the end of the script, we can see that a validation accuracy of around 88% was achieved after training.

Input Parameters and API Access
Now that we have a runnable notebook to train the screw classification model, we can tweak parameter values and then submit our notebook as a job via the PrimeHub Notebook Extension.
Tweak Parameters
First, let's allow the editing of the base_learning_rate input parameter. This will enable us to submit jobs with a different learning rate and compare model accuracy.
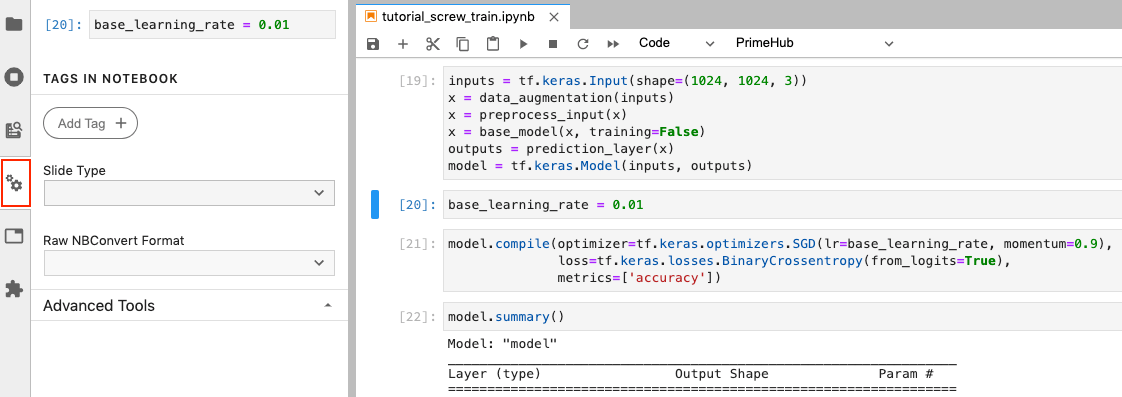
Click cell 20 where the default base_learning_rate is configured.

With cell 20 selected, click the Property Inspector button.
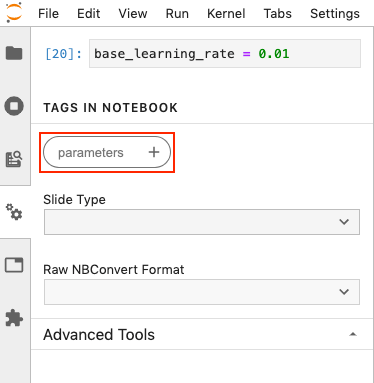
Click Add Tag and enter parameters as the tag name, then click the + icon to add the tag. Adding this tag allows us to override the base_learning_rate.
Set up an API Token
To submit the notebook as a job, we need to set up an API Token.
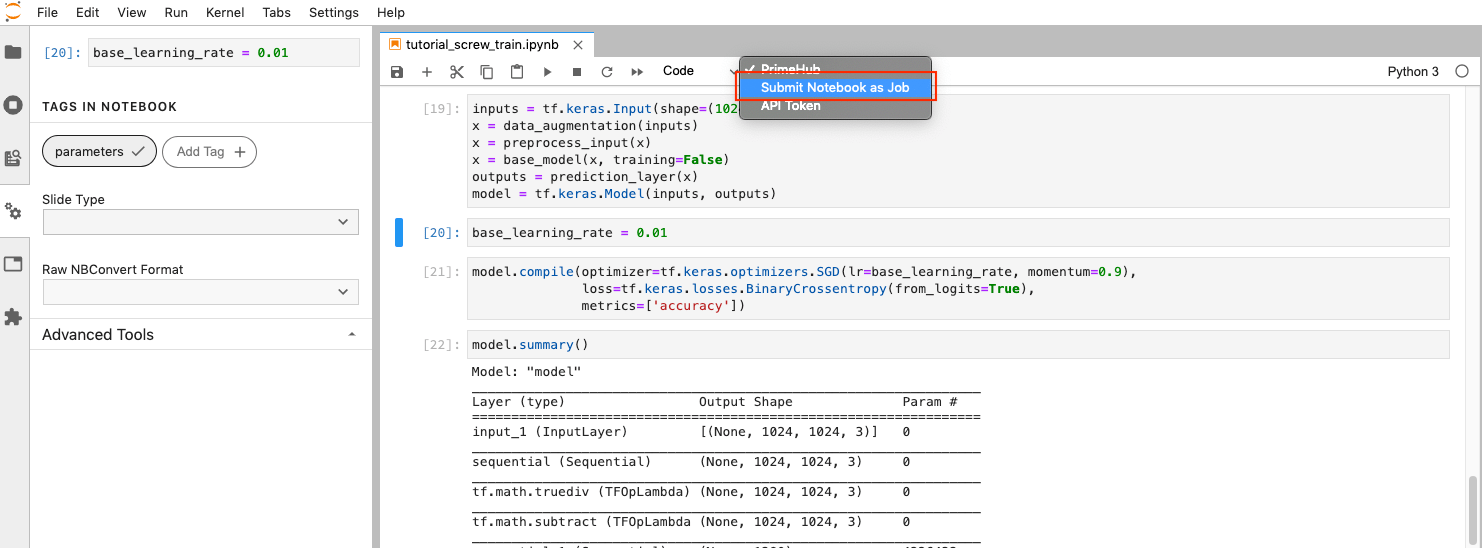
Click on the PrimeHub dropdown menu in the toolbar, then click API Token.
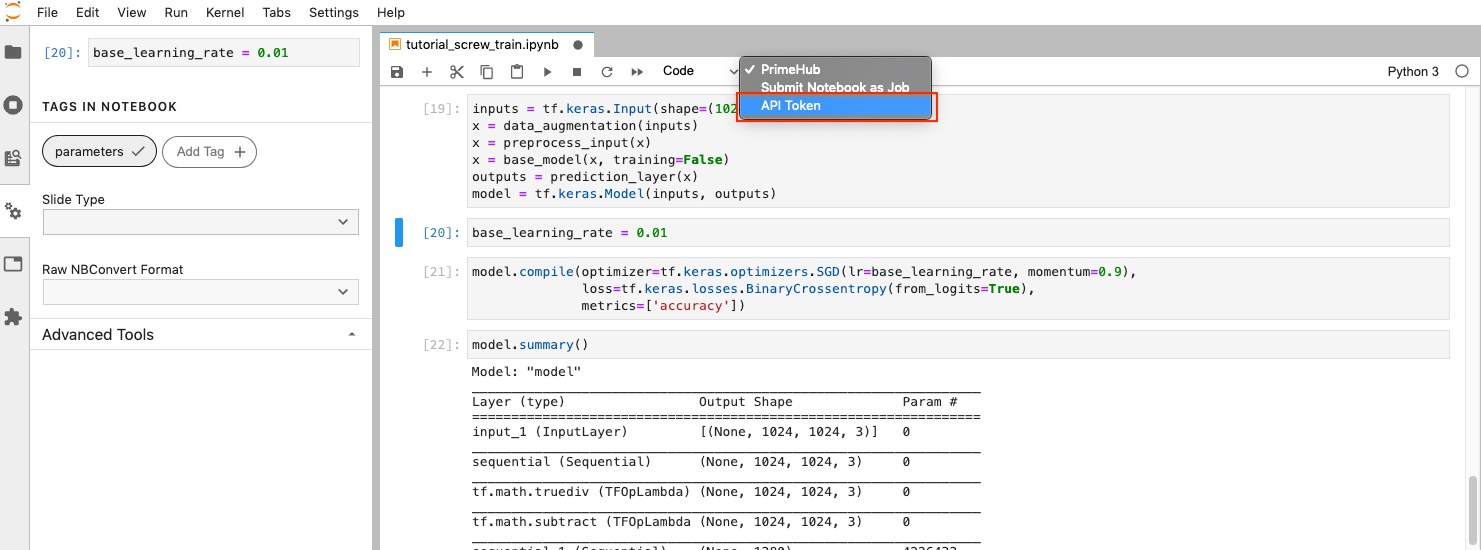
In the pop-up dialog you will see the message Visit here to access your API token. Click the here link in the pop-up dialogue and the PrimeHub API Token page will open in a new tab.
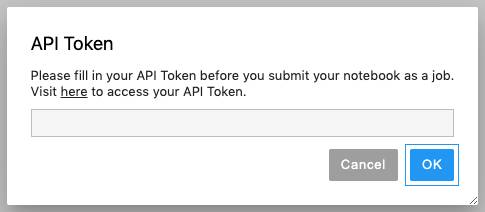
On the API Token page, click the Request API Token button.

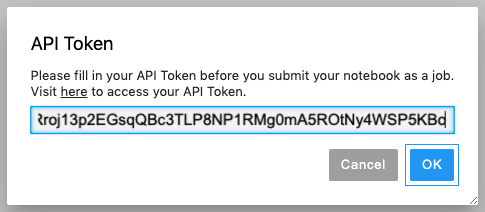
Click the Copy button to copy the API token to your clipboard.

Go back to your notebook and paste the API token into the text field, then click OK.
Submit Notebook Jobs
With API access now configured, we can submit notebook jobs. To compare the effect of different base_learning_rate values on results, we will submit two jobs.
Click the PrimeHub dropdown in the toolbar again, but this time click Submit Notebook as Job.
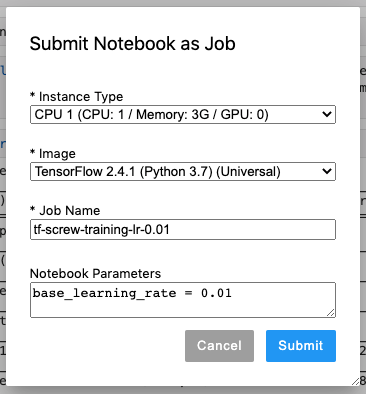
In the pop-up dialog, we can adjust the following settings:
- Instance Type to adjust computational resources
- Image to execute the notebook in different environments
- Notebook Parameters to alter parameter values
Job 1: Base Learning Rate of 0.01
Leave the Instance Type and Image settings as default, and enter the following:
- Job Name:
tf-screw-training-lr-0.01 - Notebook Parameters:
base_learning_rate = 0.01
Click Submit to start training with a base_learning_rate of 0.01.
Job 2: Base Learning Rate of 0.05
For the second job, as above, leave Instance Type and Image settings as default, then enter the following:
- Job Name:
tf-screw-training-lr-0.05 - Notebook Parameters:
base_learning_rate = 0.05
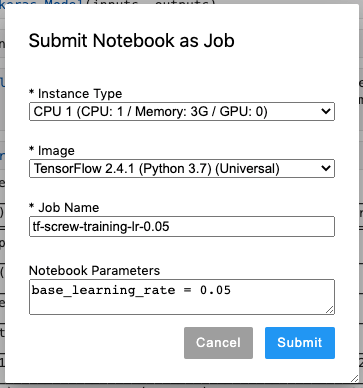
Click Submit to start the second job.
PrimeHub Jobs
The status of the jobs can be found in PrimeHub Jobs, by clicking Jobs in the left sidebar of the PrimeHub User portal
Here we can see our two recent jobs have succeeded. The results of each notebook training job has also been automatically exported to MLflow.

Conclusion
In this tutorial we have installed MLflow, connected it to PrimeHub, trained our model, and submitted two jobs, each with a different parameter value.
In the next tutorial, we will analyze the two sets of results, manage the trained models, and deploy the best model to the cloud.