3 - Manage, Compare, and Deploy the Model
In this tutorial, we will go to MLflow app to compare training results in different parameters. Also, the best training results can be registered to PrimeHub Model Management and further deployed to be an onlice service in PrimeHub Model Deployment.
What we need?
- Enable
Model Deploymentin your group.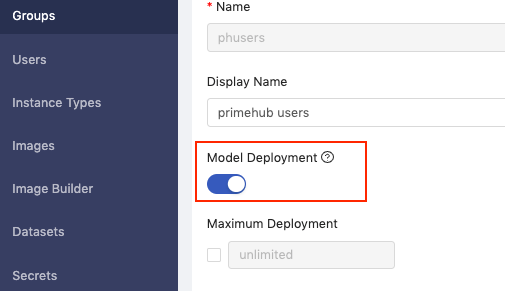
Model Management (Choose Best Model)
With the Submit Notebook as Job feature, we can set multiple variable combinations to fine-tune our model.
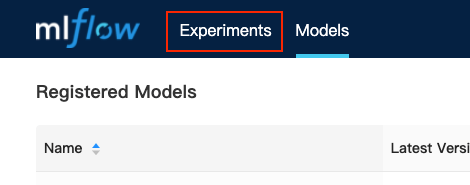
After all submitted jobs completed, we now go to Models page and click MLflow UI.

In the MLflow UI, switch to Experiments tab.
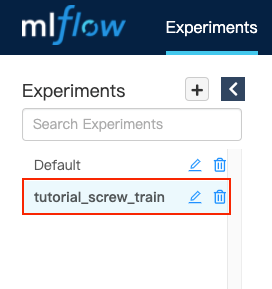
Select our specified experiment name tutorial_screw_train.
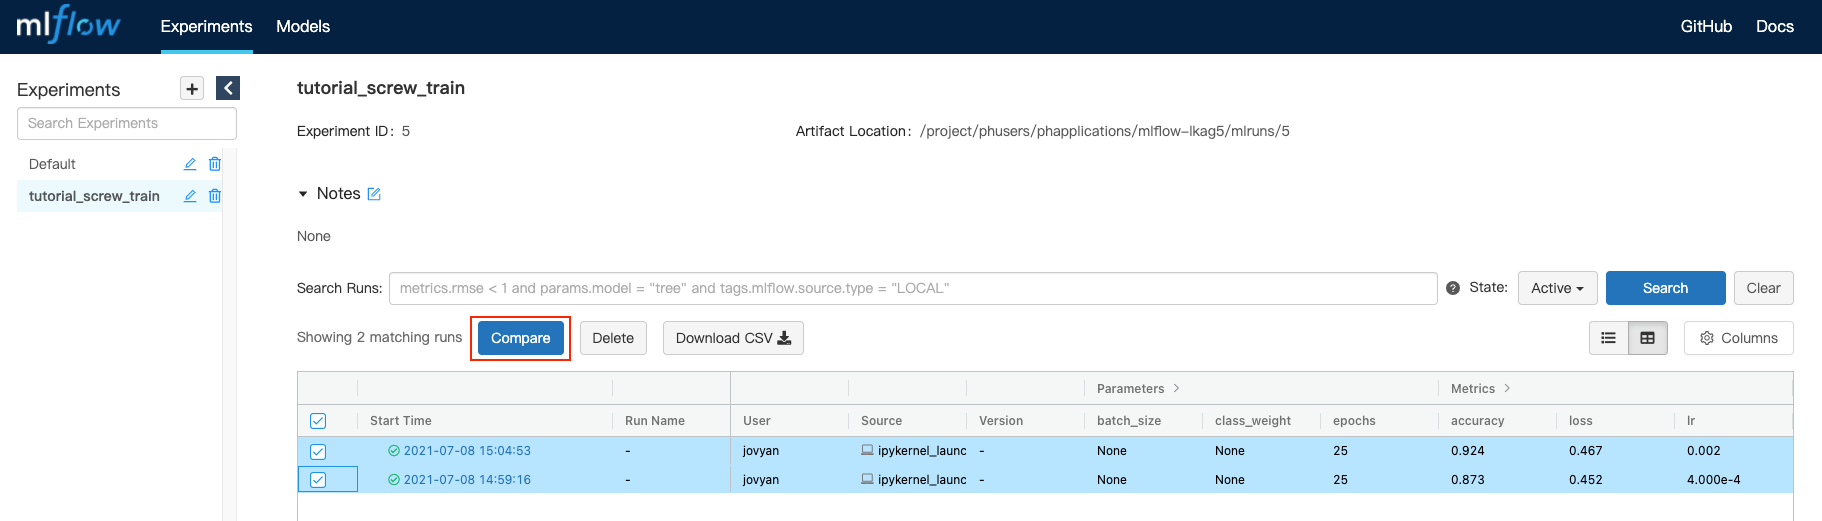
It shows all runs in tutorial_screw_train experiment, now check our two executed runs and click Compare.
We will be directed to page that comparing 2 runs' parameters and metrics. We analyzed these 2 runs and found the base_learning_rate=0.01 can perform better results.

Thus, we click its Run ID: b353b109a79b4ba0ab4dadc3da4a1b03.

Both parameters, metrics, and artifacts of this run can be found in this page.
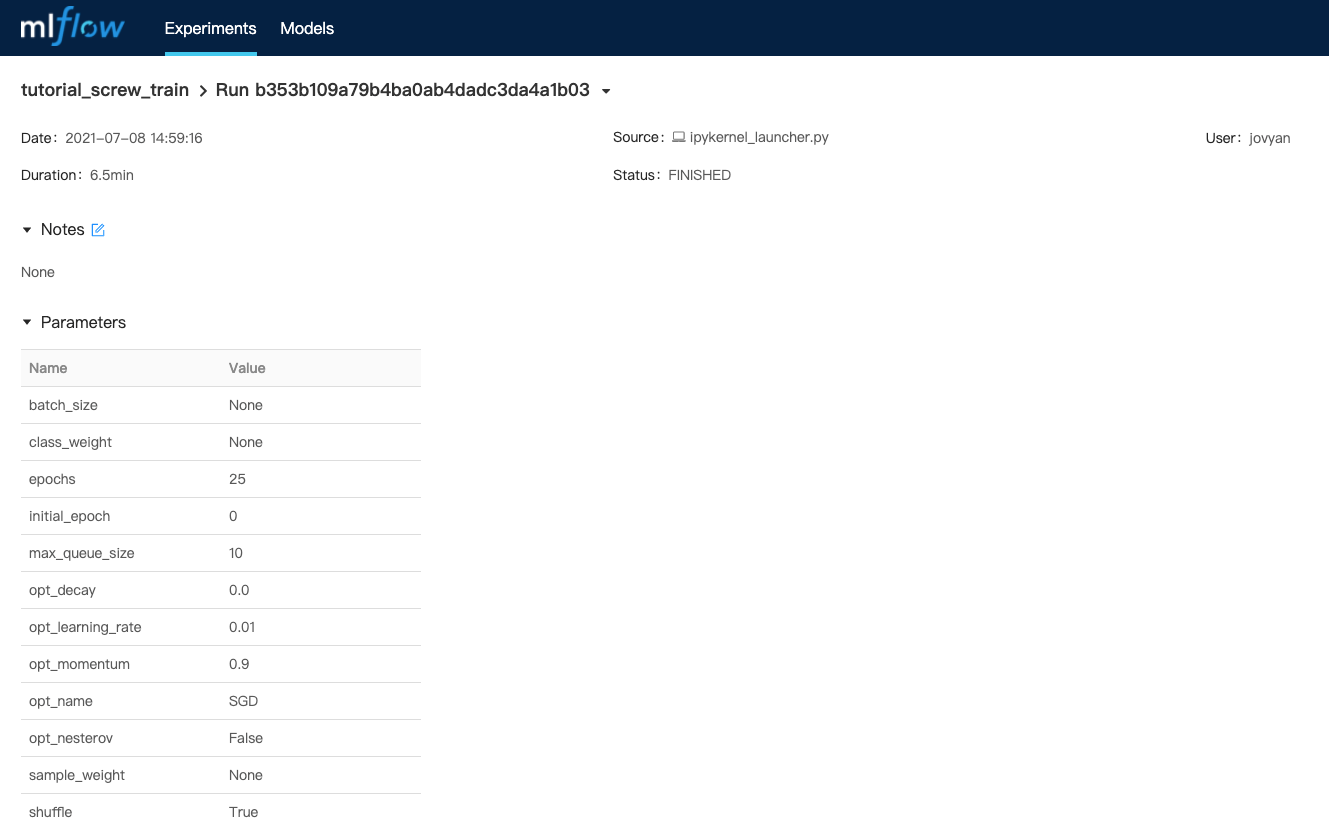
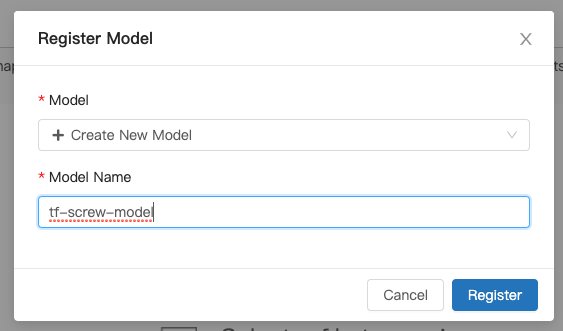
Scroll down to the artifacts section. Click exported model and Register Model.

In the model selector, choose Create New Model.

Fill in model name with tf-screw-model and click Register.
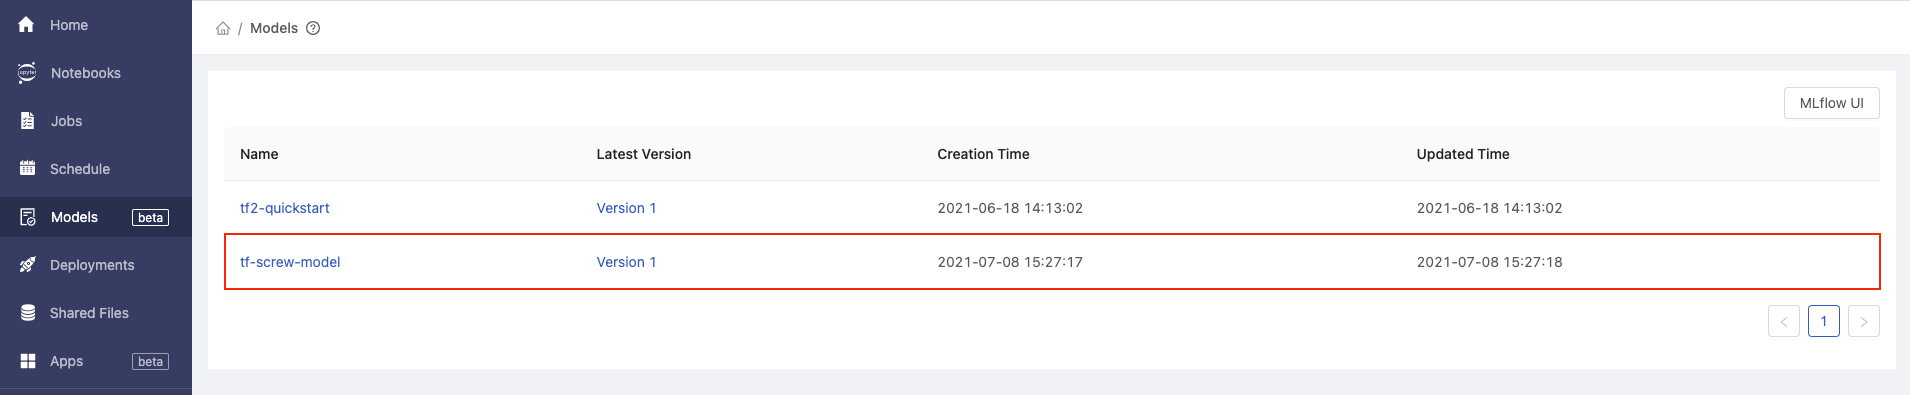
We can see our model is successfully registered as version 1.

Back to PrimeHub UI and refresh the Models page, we can see our model tf-screw-model is managed in model list.
Customize Model Server Image
Now, we have registered current best model in Model Management. To deploy the managed model, we need to setup the pre-packaged model image to be runnable container environment.
Use the Tensorflow2 Prepackaged Model Server as template of pre-packaged model image.
git clone https://github.com/InfuseAI/primehub-seldon-servers.git
cd primehub-seldon-servers/tensorflow2/
We can edit tensorflow2/Model.py to meet our input data requirements.
Original template
def predict(self, X, feature_names = None, meta = None):
    ...
    if isinstance(X, bytes):
        img = Image.open(BytesIO(X))
        img = np.array(img).astype(np.float32)
        X = np.copy(img)
        X /= 255.0
        X = np.expand_dims(X, axis=0)
    ...
Ours
def predict(self, X, feature_names = None, meta = None):
    ...
    if isinstance(X, bytes):
        img = Image.open(BytesIO(X))
        img = np.array(img).astype(np.float32)
        img = np.stack((img,)*3, axis=-1)
        X = np.expand_dims(img, axis=0)
    ...
The np.stack((img,)*3, axis=-1) can convert a grayscale input image to a 3-channel image, making it able to fit the shape of model input layer.
After edited the Model.py, let's execute following command to build the pre-packaged model image.
docker build . -t tensorflow2-prepackaged
Execute docker images to check the built image.
REPOSITORY                TAG          IMAGE ID       CREATED        SIZE
tensorflow2-prepackaged   latest       689530dd1ef9   3 minutes ago  1.67GB
Next, tag the built image based on your docker registries, we added screw-classification tag to this image and used Docker Hub to store image.
docker tag tensorflow2-prepackaged:latest infuseai/tensorflow2-prepackaged:screw-classification
Push to docker registry.
docker push infuseai/tensorflow2-prepackaged:screw-classification
Finally, our pre-packaged model image is pushed to infuseai/tensorflow2-prepackaged:screw-classification and ready to serve model in Model Deployment.
Model Deployment
Now, we have prepared the trained model in Model Management and pushed the customized pre-packaged model image to Docker Hub.
Let's continue to deploy our model!
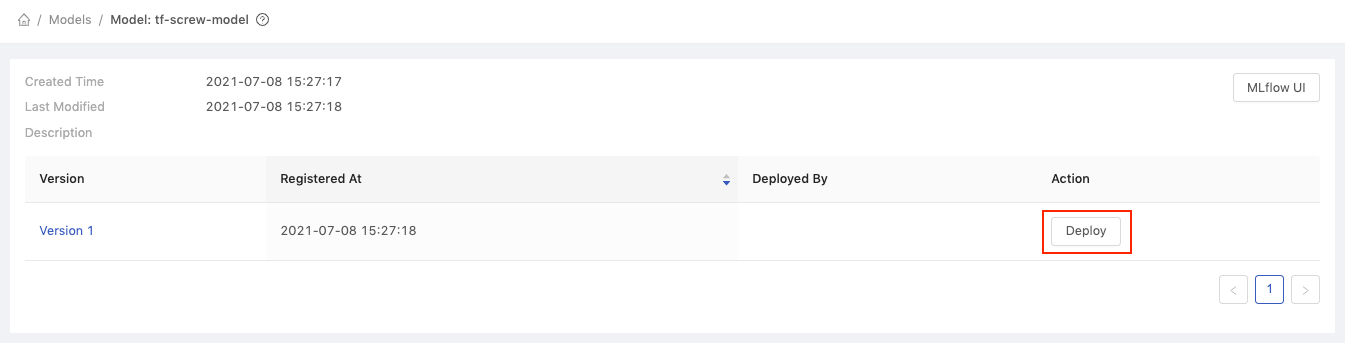
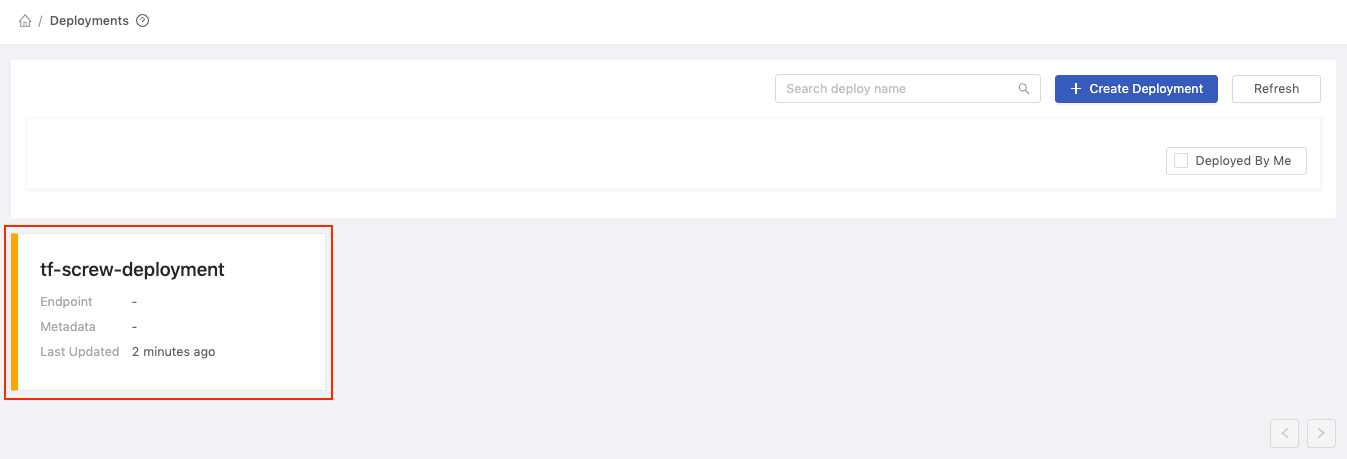
Back to Models page, click our managed model name tf-screw-model.
It shows all versions of tf-screw-model, let's click Deploy button of Version 1.
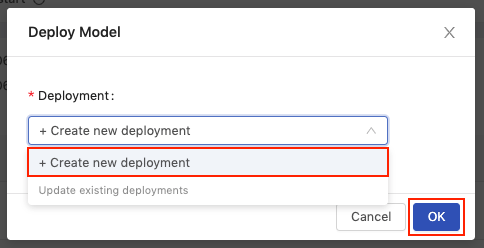
In the deployment selector, choose the Create new deployment and click OK.
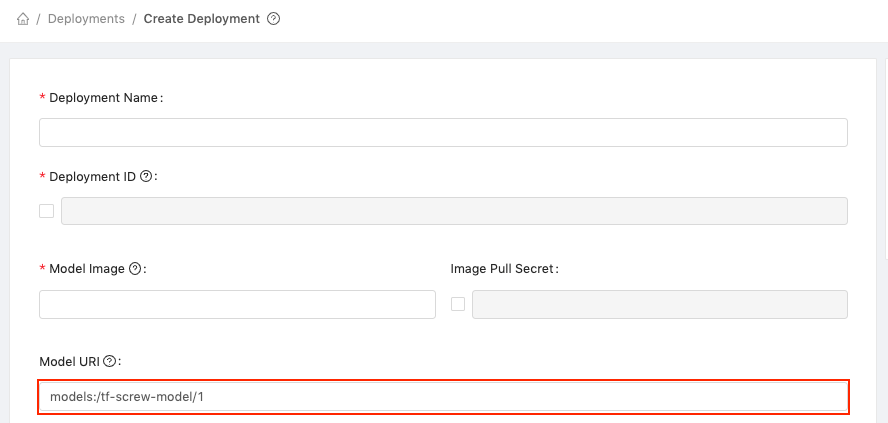
We will be directed to Create Deployment page. And the Model URI field will be auto fill-in with registered model scheme (models:/tf-screw-model/1).
Next,
- Fill in
Deployment Namewithtf-screw-deployment. - Fill in
Model Imagewithinfuseai/tensorflow2-prepackaged:screw-classification; this is our customized pre-packaged model image that can serve the trained screw model.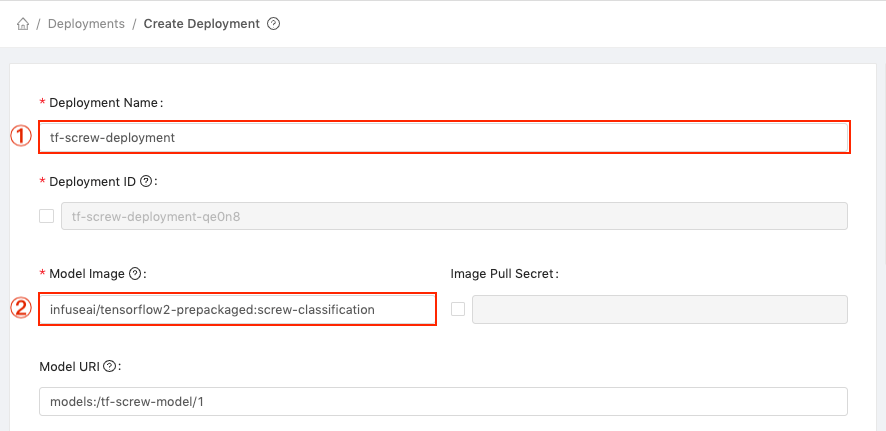
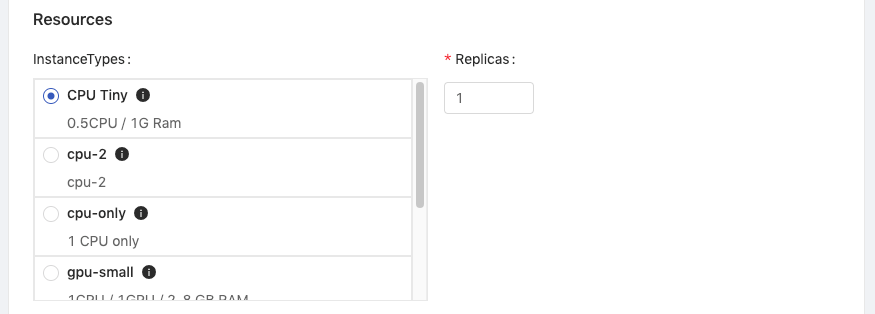
Choose the instance type, the minimal requirements in this tutorial is CPU: 0.5 / Memory: 1 G / GPU: 0.
Then, click Deploy.
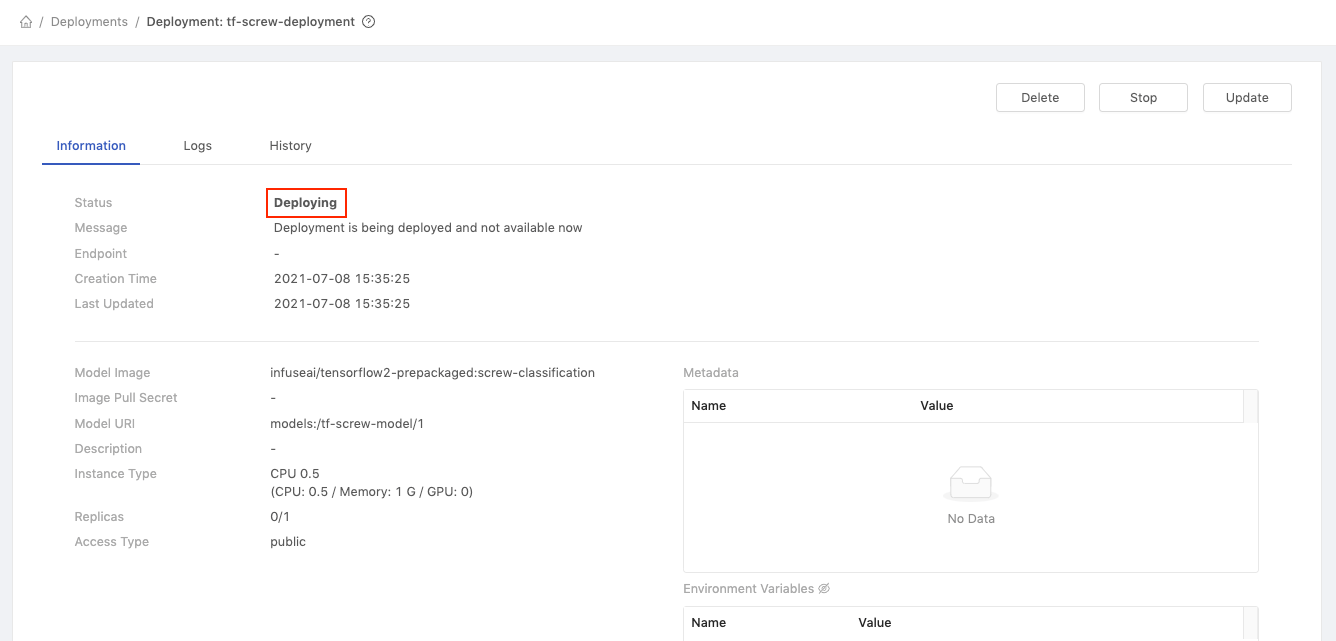
Our model is deploying, let's click the tf-screw-deployment cell.
In the deployment detail page, we can see the status is Deploying.
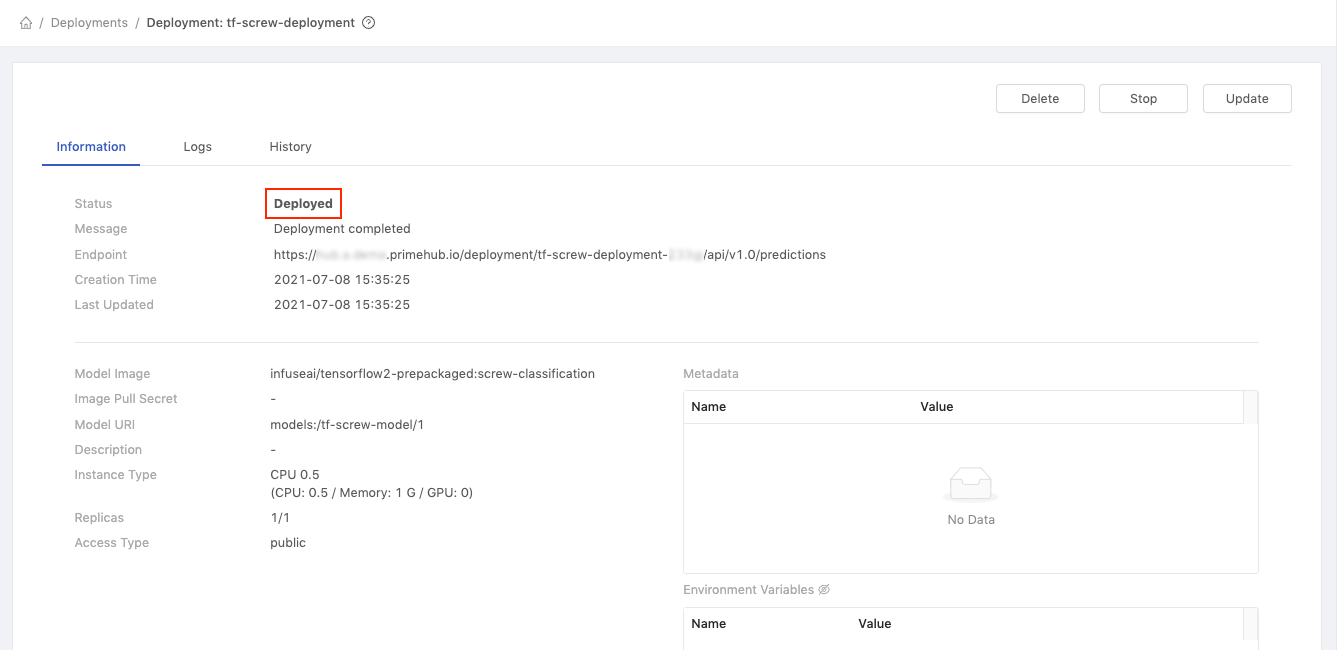
Wait for a while and our model is Deployed now!
We can view some detailed information, now let's copy the value of Endpoint (https://.../predictions) to test our deployed model!
Replace ${YOUR_ENDPOINT_URL} with your Endpoint value in the following block.
curl -F 'binData=@path/to/image' ${YOUR_ENDPOINT_URL}
Then copy the entire block to the terminal for execution, and we are sending exact image as request data.
Example of request data
curl -F 'binData=@val/good/000.png' https://xxx.primehub.io/deployment/tf-screw-deployment-xxxxx/api/v1.0/predictions
Example of response data
{"data":{"names":["t:0"],"tensor":{"shape":[1,1],"values":[2.065972089767456]}},"meta":{"requestPath":{"model":"infuseai/tensorflow2-prepackaged:screw-classification"}}}The
positivereturn value represented asgoodscrew; and thenegativereturn value represented asbadscrew.Therefore, the return value
2.065972089767456indicated that the requested screw image is a good screw!
Summary
Congratulations! We have finished the tutorials!
In the 1 - Label Data, we've used Label Studio installed in PrimeHub Apps to label the screw images.
- In addition to image data,
Label Studiocan also be beneficial to text, audio, and video data labeling. - In
PrimeHub Apps, it provides an easy way for setting up well-known applications for your team such as Code Server, Matlab, Label Studio, MLflow, and Streamlit. Allowing users to orchestrate data/tools for the acceleration of machine learning workflow.
In the 2 - Train and Tune the Model, we've trained the model in PrimeHub Notebooks and submit entire notebook file as a parameterized job. Furthermore, the results of training job is logged to MLflow app for experiment tracking.
- With the feature of
submit notebook as job, we can simply adjust instance type to gain more running resources, change image to make notebook execution on experimental environment, and even use different parameter specifications to achieve flexible parameter tuning. - With configured
MLflowapp, we can easily performMLflow autologginginPrimeHub NotebooksandPrimeHub Jobs. It makes every training execution can be parsed and collected so that we can review parameters, metrics, and artifacts of each training history.
In the 3 - Manage, Compare, and Deploy the Model, we've made the best model to be version managed in PrimeHub Model Management and deployed it as an endpoint service in PrimeHub Model Deployment.
- In
Model Management, the trained models can be version managed in different projects, frameworks, or any designated patterns. Users can reuse previous trained models, deploy the latest model toModel Deployment, and share the well-trained models across teams. - In
Model Deployment, we can customize model input/output in model image then deploy it in a cloud-ready environment. It is no need to prepare the infrastructure for model deployment purpose by yourself, PrimeHub will setup all required resources to ensure it can respond to requests anytime from everywhere.
With PrimeHub, you will experience a wonderful machine learning journey! Enjoy it!